 This post is part of the In Microsoft Dynamics 365 Business Central (Inventory and Warehouse Management), how do I… series and of the wider In Microsoft Dynamics 365 Business Central, how do I… series which I am posting as I familiarise myself with Microsoft Dynamics 365 Business Central.
In a previous article of this series on understanding inventory picks, I mentioned there was three ways in which an inventory pick could be processed:
- Process an Inventory Pick from the Source Document
- Process Multiple Inventory Picks Using a Batch Job
- Process an Inventory Pick in Two Steps by Releasing the Source Document
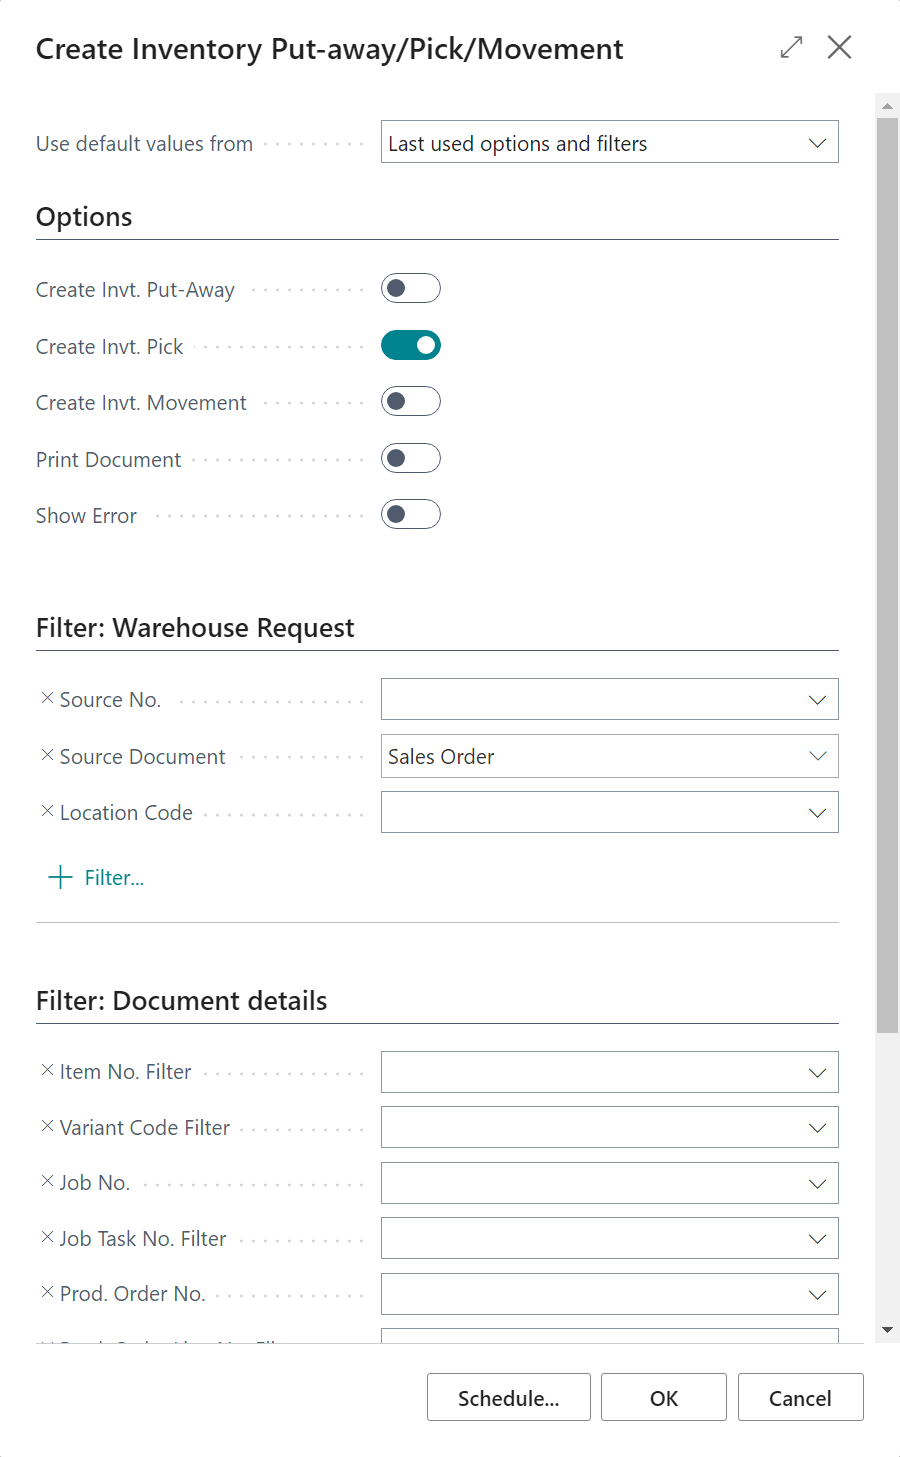
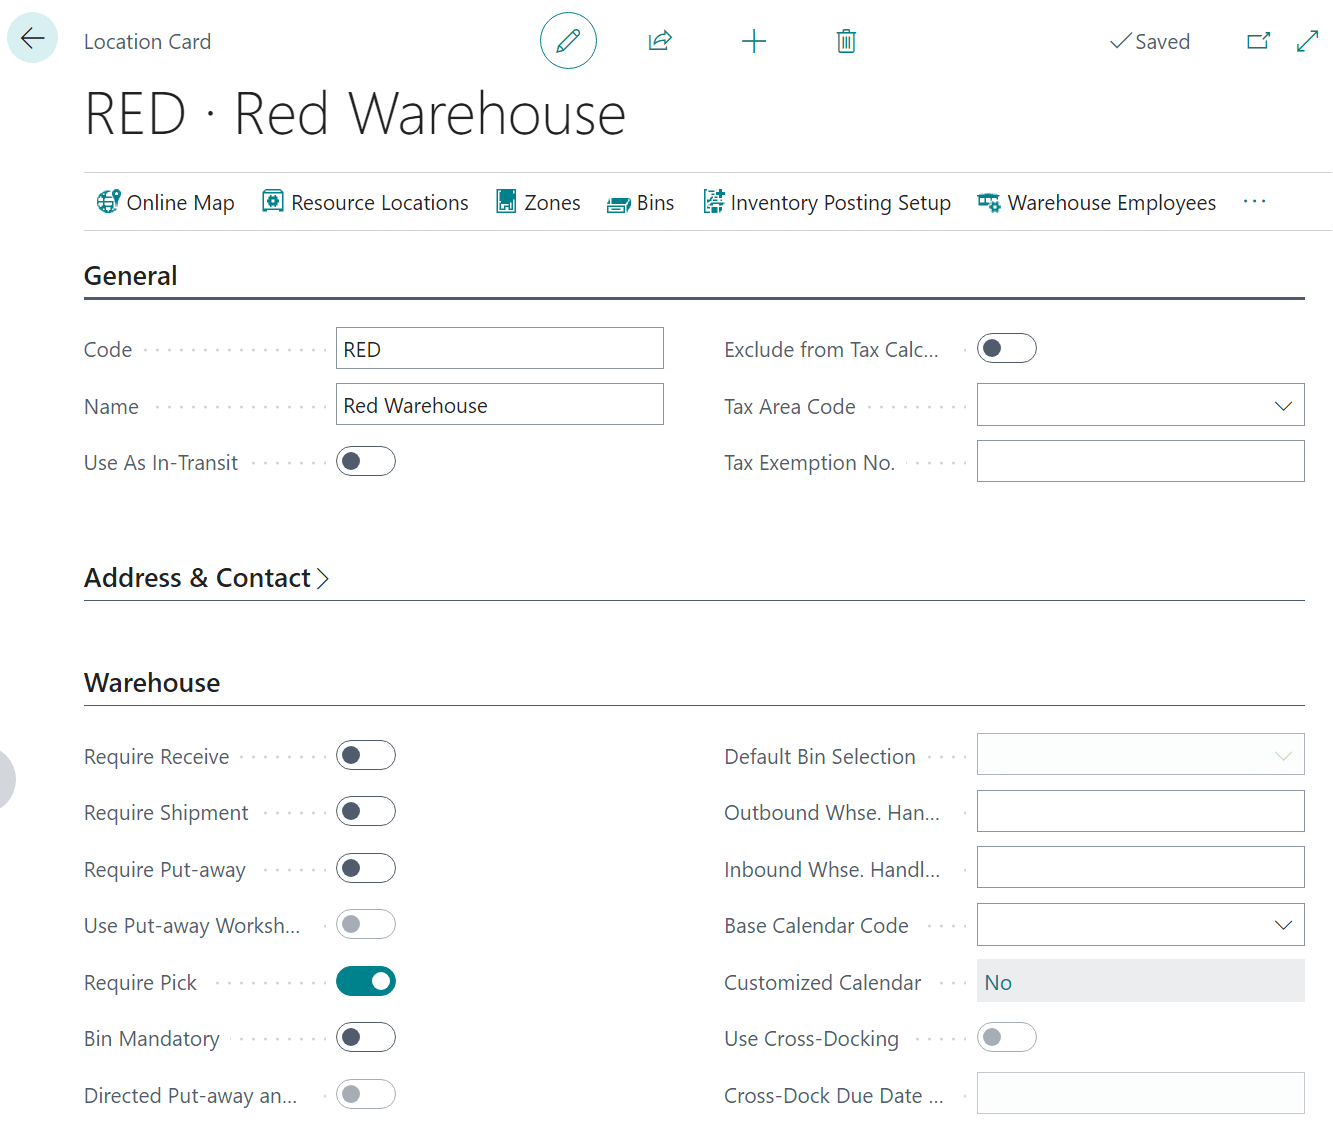
In this article, I am going to take walk through processing inventory picks using a batch job for the BLUE location on which I enabled Require Pick.
To use the batch job for creating inventory picks, search for the Create Inventory Put-away/Pick/Movement page.
The options on this page will need to be configured to restrict which incoming documents have inventory picks created. I have opted for all (released) sales orders; click OK to create the picks or Schedule to schedule the batch job to run at a designated time: