 With Microsoft Dynamics GP installed, configured and the sample company deployed, it’s time to add the Web Client Runtime to the clients.
This is done by opening Programs and Features, selecting Microsoft Dynamics GP 2013 and clicking Change:
 While most people reading this series are likely to already have an up and running Micrsoft Dynamcis GP system, I am going for completion in coverage for this series so I am going to be doing posts on items such as installing the client (this post), installing the server and deploying the sample company.
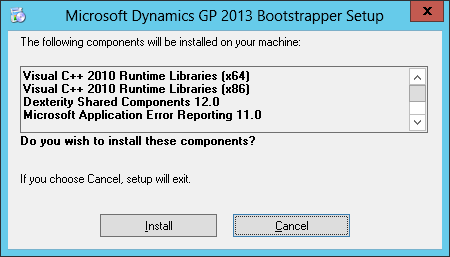
To install the Microsoft Dynamics GP 2013 SP2 client, run the setup.exe on the installation media. This will check if required components are installed or not and run the Microsoft Dynamics GP 2013 Bootstrapper Setup to install any missing components:

 Depending on your selected options when installing the Microsoft Dynamics GP web client, there are between three and four service accounts required.
The three which are always required are:
The one which is optional dependent on installation options is:
This last is only required if the Management COnsole is installed to a different web site to the web client.
To create the service accounts, you need to be logged onto the Domain Control (in my case DC1 which is running Windows Server 2008 R2) and open Active Directory Users and Computers.
 There are two security groups required for the Microsoft Dynamics GP web client:
To create these groups we need to be logged onto the domain controller which on my test system is AZC-DC1.
On the domain controller, open Active Directory Users and Computers.
I decided to create a business unit called Microsoft Dynamics GP but you could create the required groups anywhere. To create the web console user’s group click the Create Group button on the toolbar:
 After updating one of my Microsoft Certifications earlier this month , I have today taken and passed the MB3-701 Microsoft Dynamics GP 2013 Financials exam.
This gives me both of the current Microsoft Dynamics GP 2013 certifications which are available. I am looking out for an update to the Inventory & Order Processing certification in the hopes Microsoft produce one.
 If a wildcard domain certificate has been used then you won’t need to follow the steps in this post. If, like me, you’re using individual machine certificates then you will have problems with trust relationships between servers unless you install the certificate from each machine on all of the others.
To accomplish this, the certificates need to be exported and then imported. As an example, I am going to transfer the certificate from the Session Control Server (SC1) to the first Session Host (SH1).
To do this open Internet Information Services (IIS) Manager, select the machine and double click Server Certificates:
 In addition to an SSL certificate for the Session Control Server certificates are also needed for the Session Hosts.
It is possible to add SSL certificates without the use of IIS, but I am not an expert in this area. To this end, I installed IIS the same way as on the Session Control Server and then created the certificate the same way too.
However, you choose to create the certificate for the Session Host machines, make sure you have one for each of the machines or apply the wildcard SSL certificate to each.
If anyone knows a way of applying a certificate to a machine without installing IIS I’d appreciate you leaving a comment below.
 Now that the SSL certificate for the Session Central Server has been created, it needs to be bound to the website to which the Session Control Server will be installed.
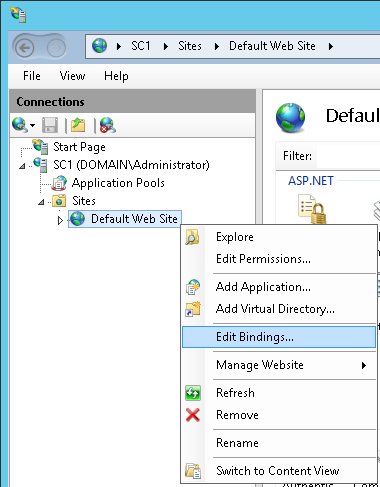
To bind the certificate, open Internet Information Services (IIS) Manager and, in the Connections pane expand the server and Sites nodes and then right click on the website you intend to use, which in this example is the Default Web Site and select Edit Bindings…:
