 This post is part of the In Microsoft Dynamics 365 Business Central (Customisation), how do I… series and of the wider In Microsoft Dynamics 365 Business Central, how do I… series which I am posting as I familiarise myself with Microsoft Dynamics 365 Business Central.
As with pages, the FactBox can also be personalized. Whether the FactBox is on a list page or a card card, or any other type of page, the process of personalizing the FactBox is the same.
There are a few actions you can take to personalize the FactBox:
- Show or hide sections.
- Move sections.
- Add or remove fields from sections.
- Move fields.
To personalize the FactBox you need to click on the Settings cog button and then on Personalize:
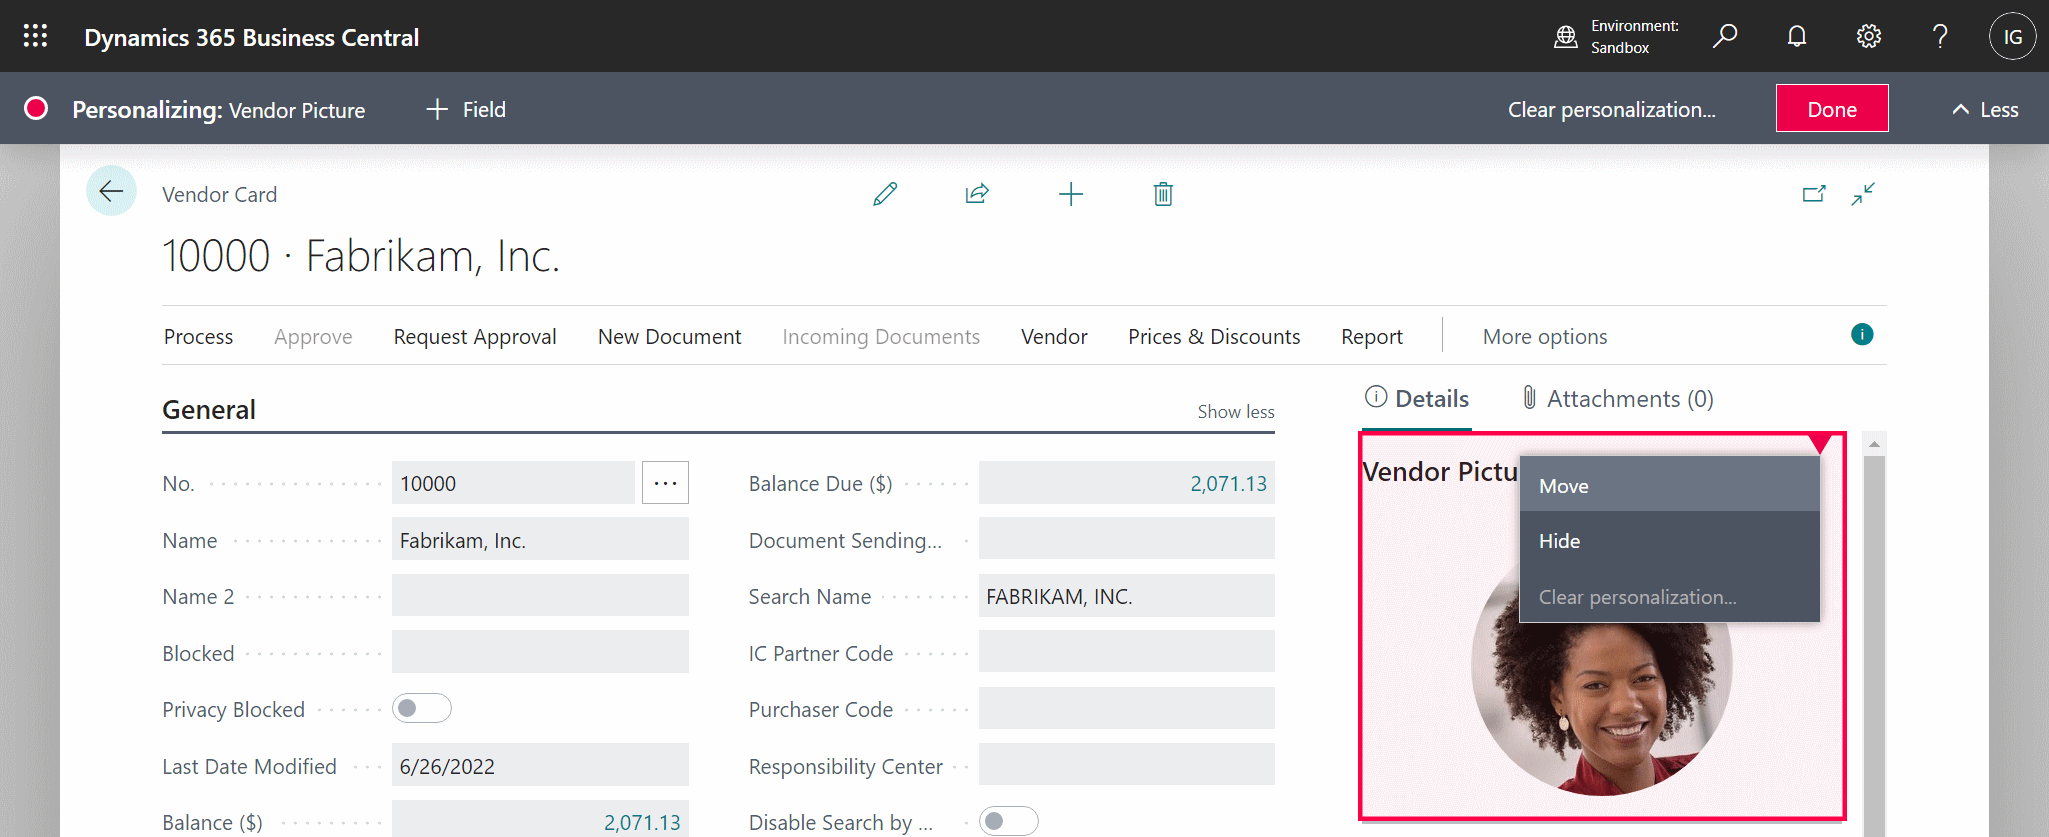
To move a section, hover the mouse over it and left-click and hold on the red triangle at the top right of the box; left-clicking on the red triangle will also give the context menu which allows you to hide the section:
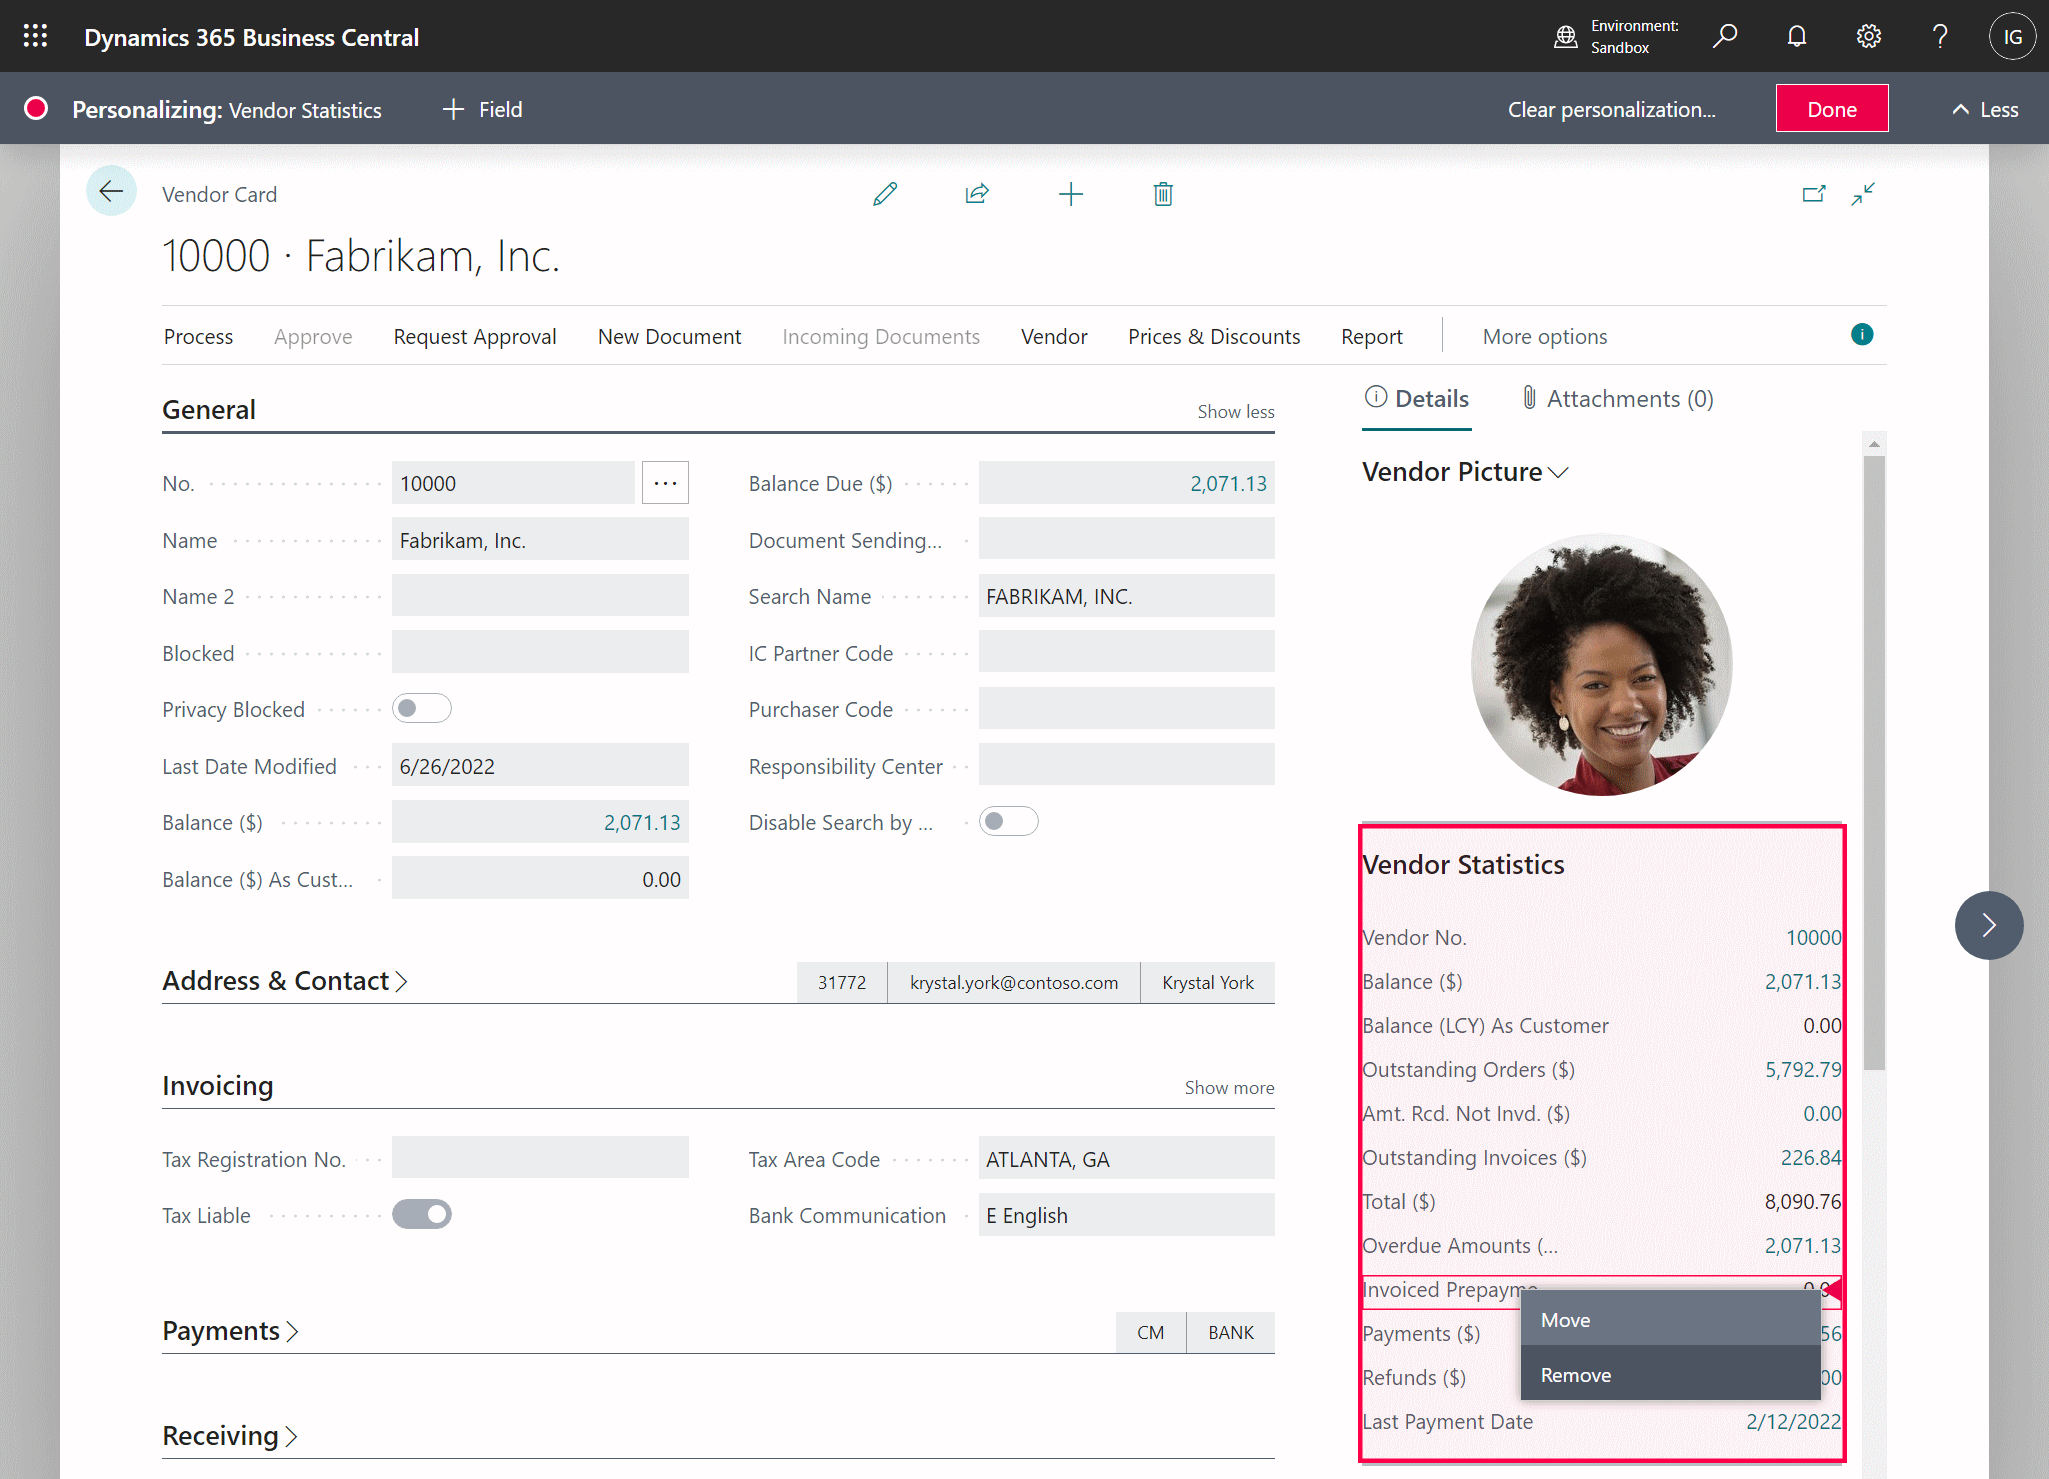
To move a field, hover over the field and left-click, hold and drag-and-drop the field to the desired location and release; you can remove a field by left-clicking and selecting Remove:
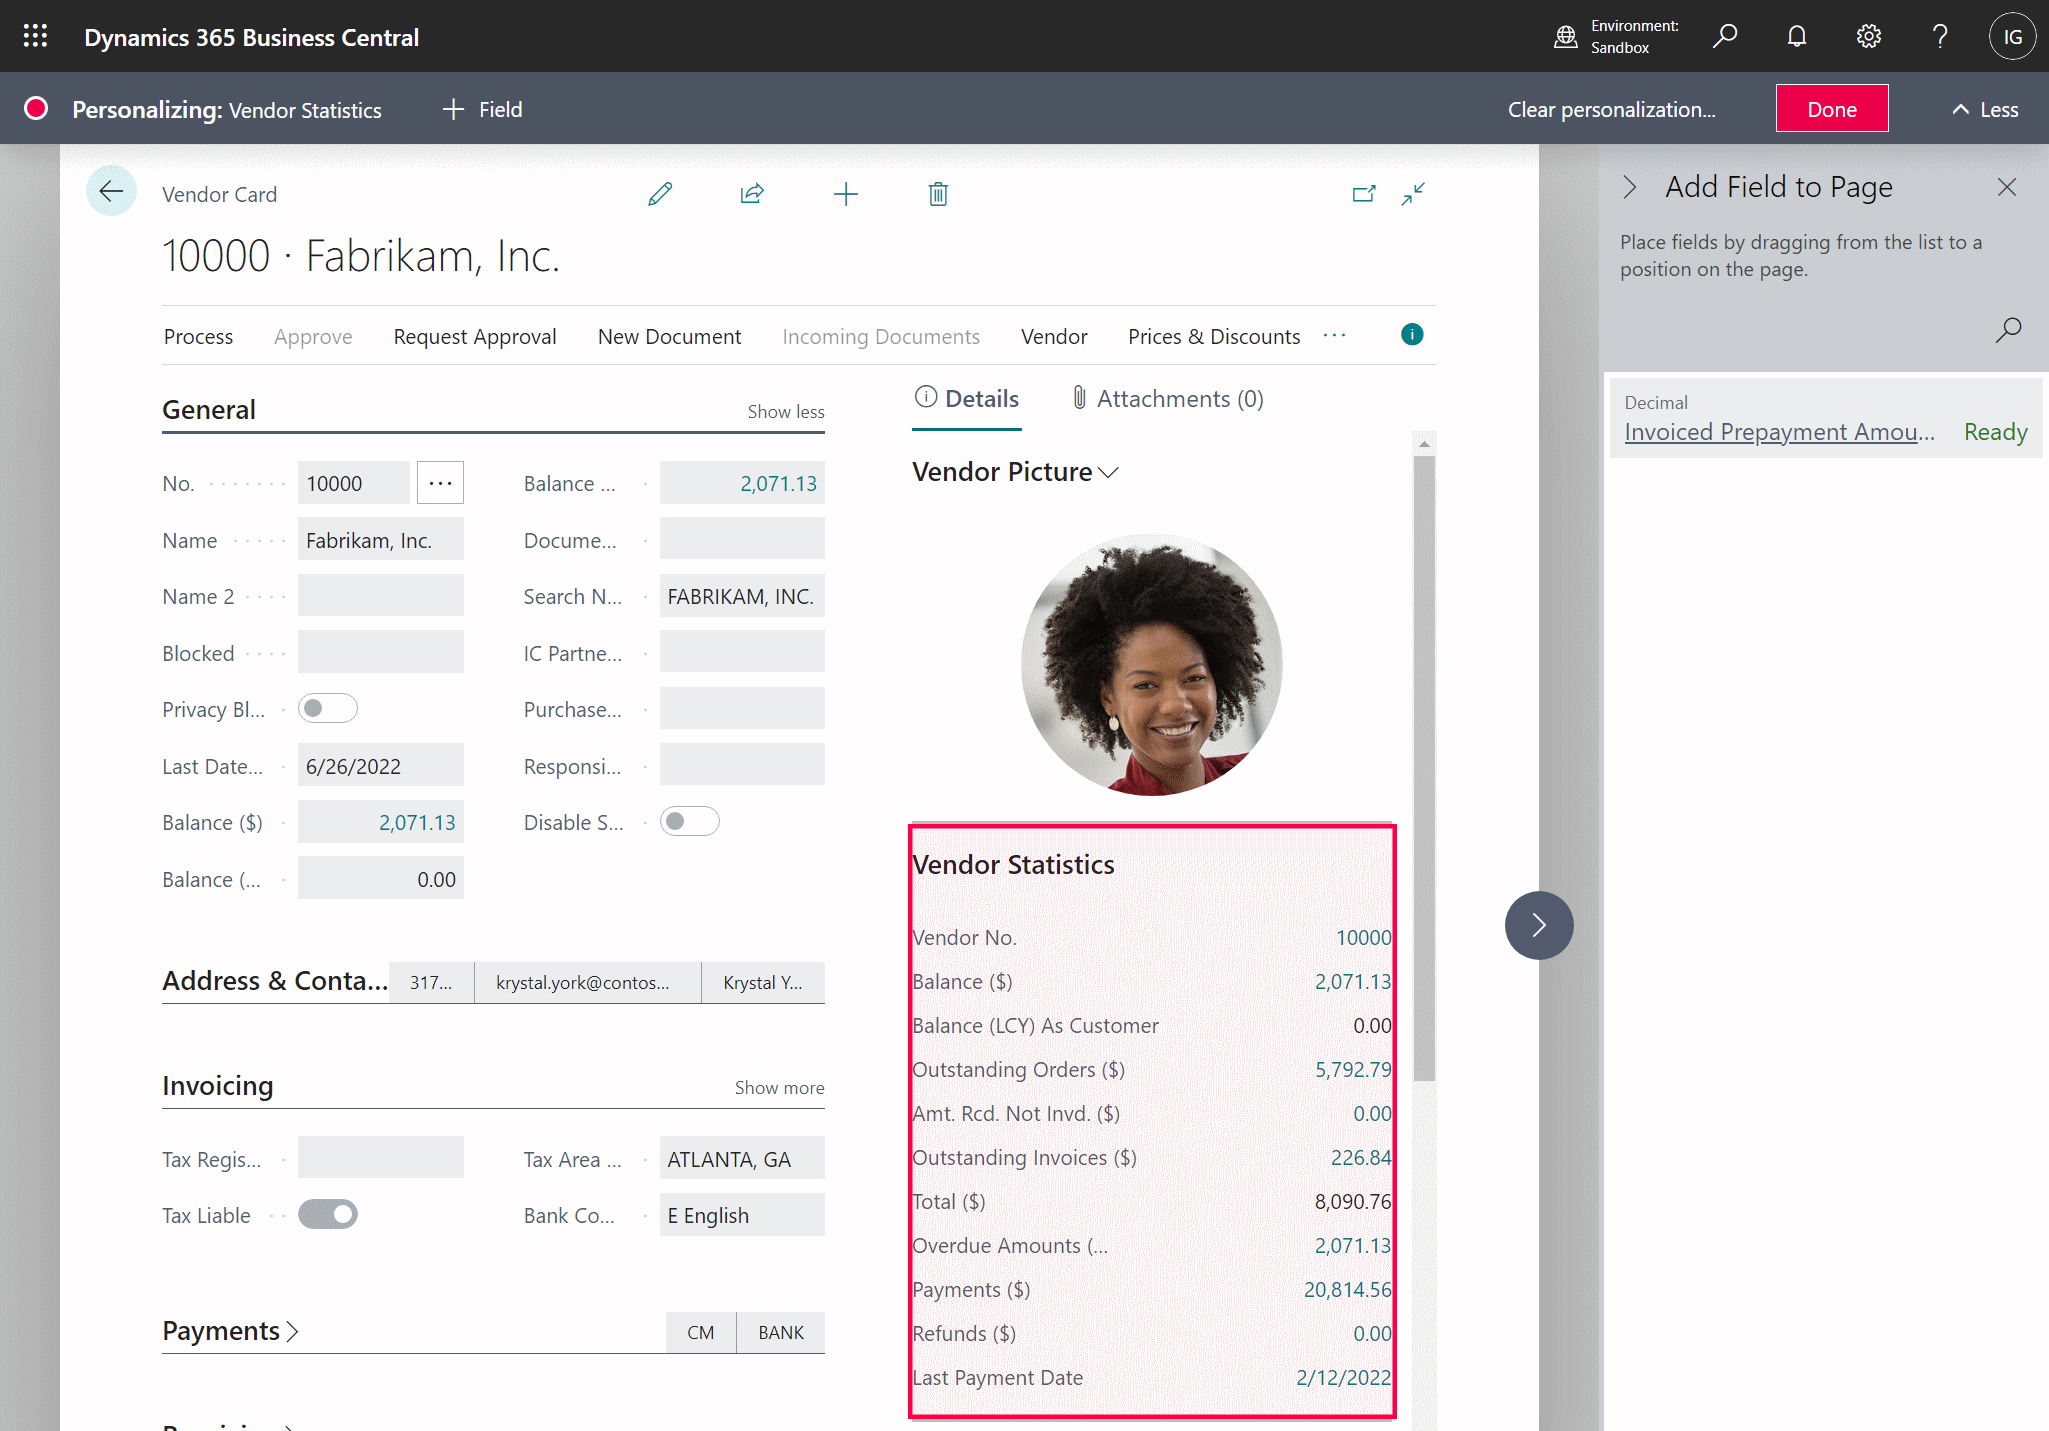
To add a field, click the Field button on the Personalizing bar; left-click and drag-and-drop the field from the Add Field to Page sidebar to the required location:
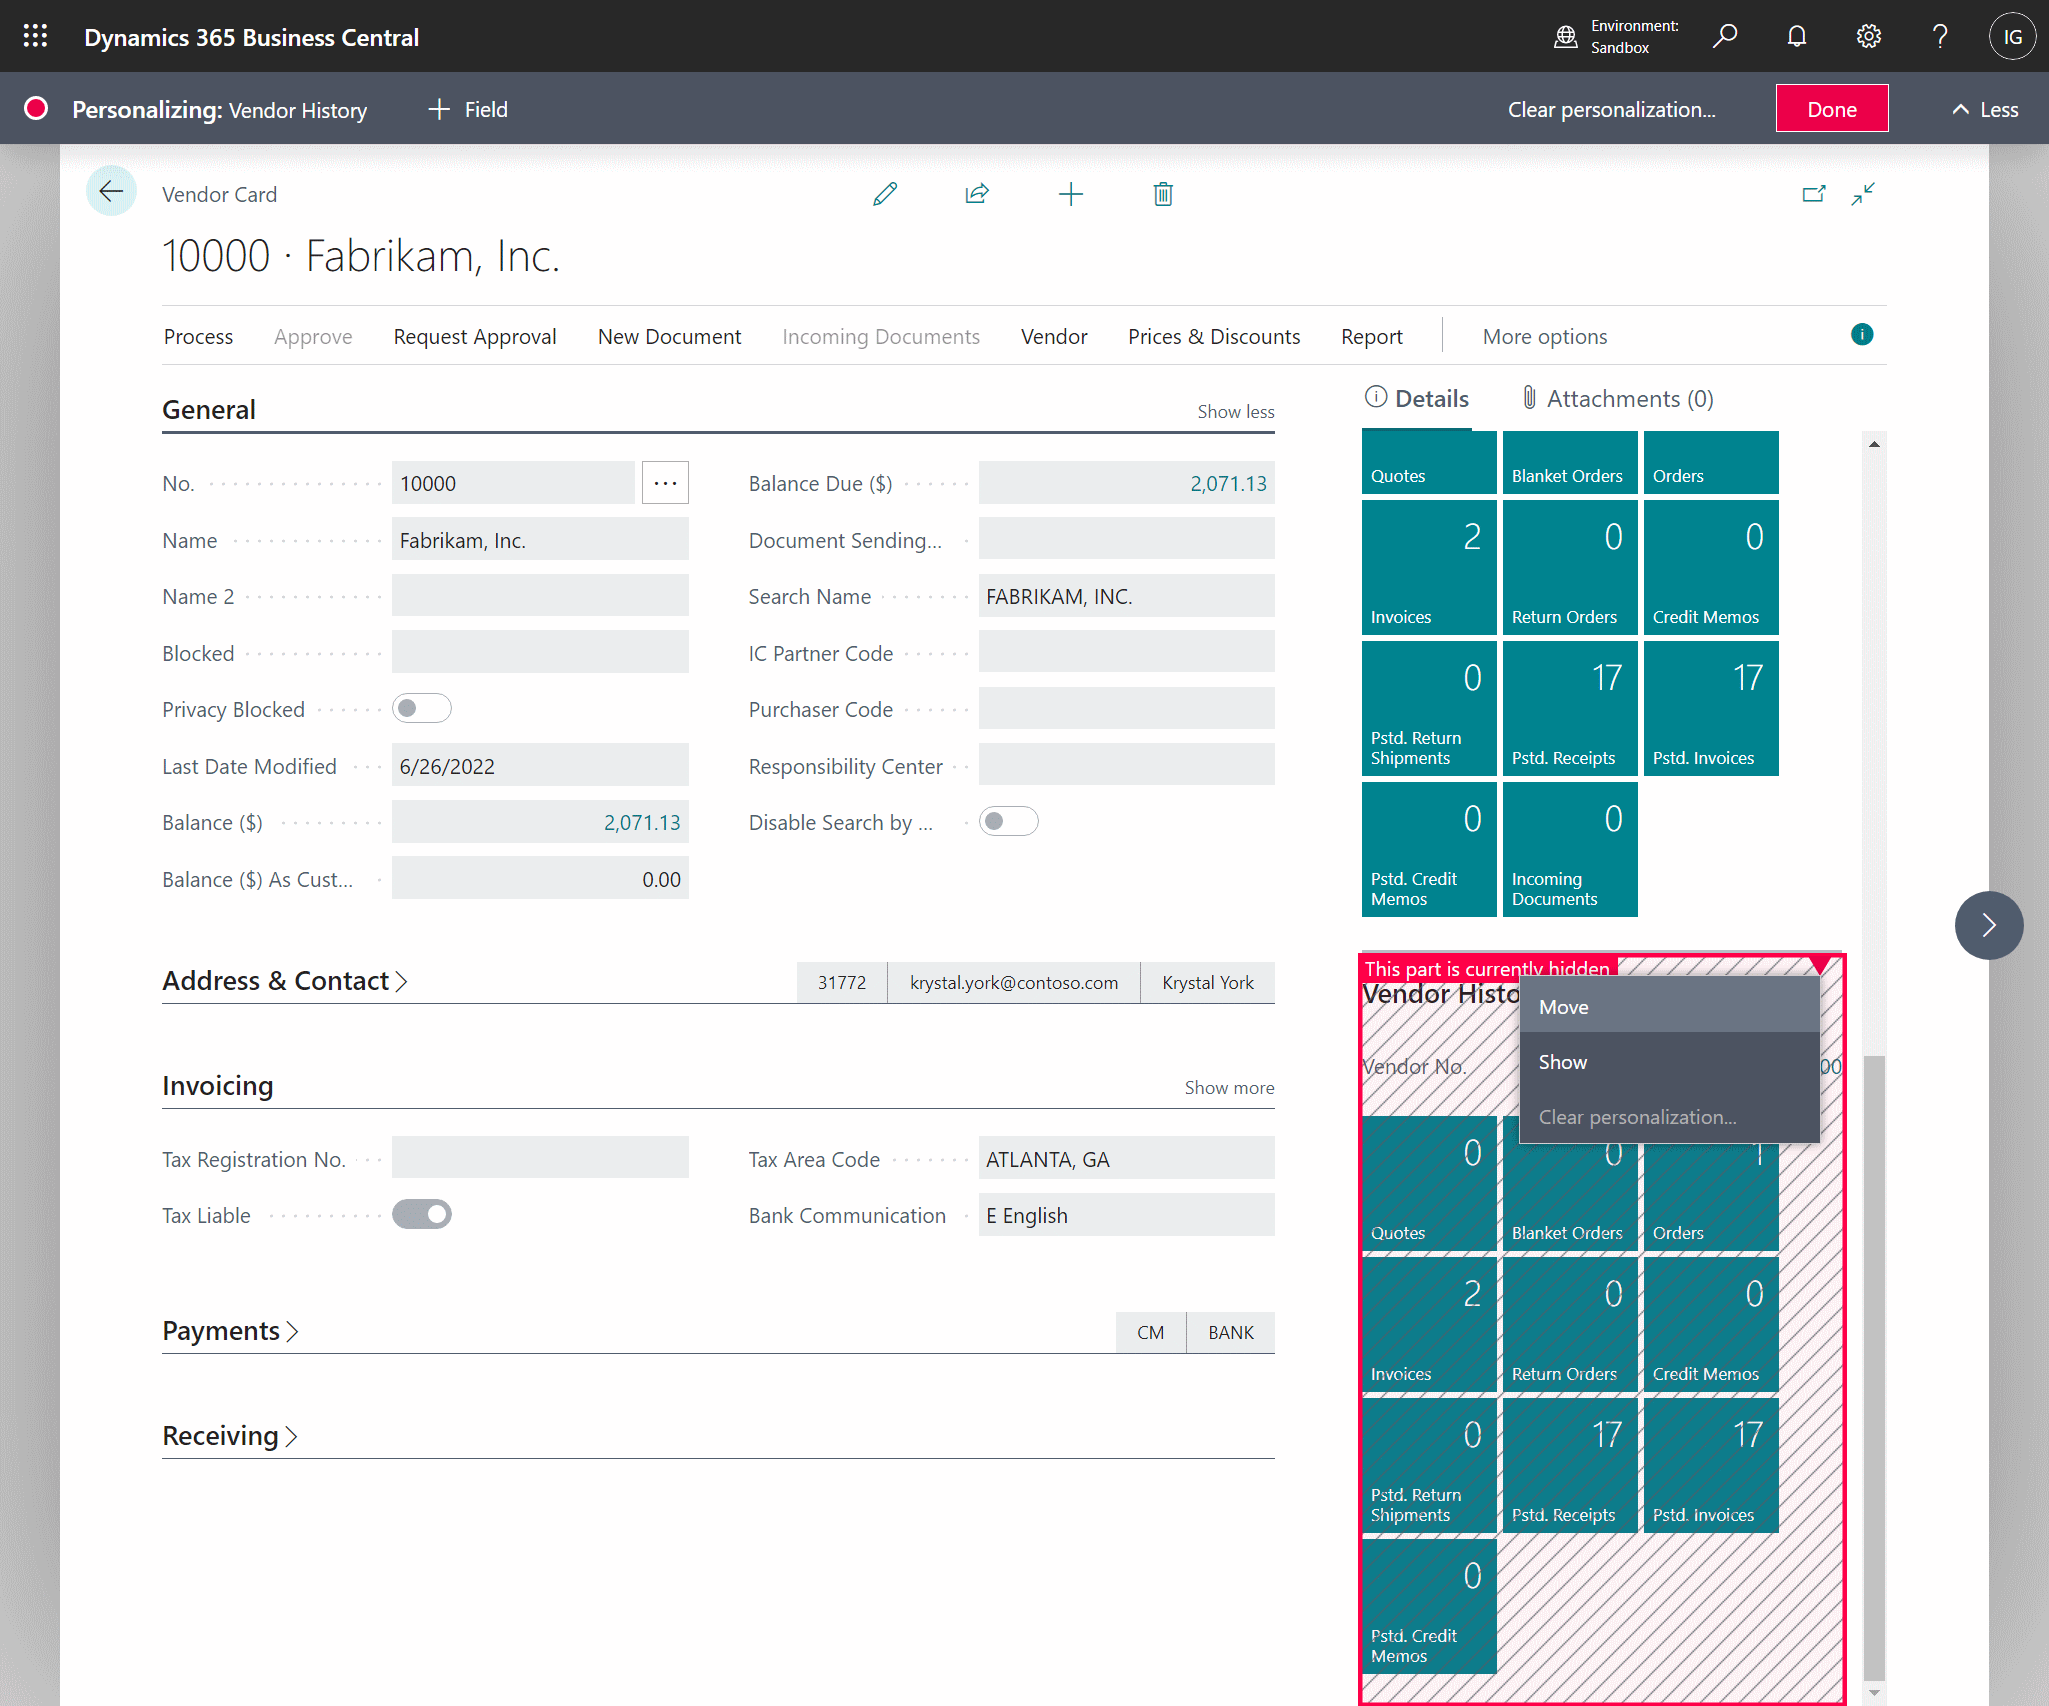
Some of the FactBoxes will have hidden sections on them without you taking any actions; whether that is the case or you want to restore a section yu’ve previously hidden, to show a hidden section, hover over it and click the red triangle at the top and then click Show:
You can also choose to clear personalizations for a section from the red triangle at the top right of a section or all persononalizations by using the Clear personalization button on the Personalizing bar.
In Microsoft Dynamics 365 Business Central, how do I…
What should we write about next?
If there is a topic which fits the typical ones of this site, which you would like to see me write about, please use the form, below, to submit your idea.


