Git Command Line Snippets: Create Release

GitHubThis post is part of the series on Git Command Line Snippets where I am taking a look at performing actions on GitHub using the git command line.

Once changes have been added, committed and pushed to the repository, we can create a release.

When developing for ClassicPress, there is also a need to upload a release zip which is used for deployment to a ClassicPress site. Unfortunately, this cannot be done while creating a release; this post is just on creating the release and a later post will cover uploading the release zip.

The following command can be used to create a release using command line:

curl -X POST -H "Accept: application/vnd.github+json" -H "Authorization: token ghp_authorizationtoken" https://api.github.com/repos/username/repository name/releases -d "{\"tag_name\":\"tagname\",\"target_commitish\":\"main\",\"name\":\"name\",\"body\":\"release comment\",\"draft\":false,\"prerelease\":false,\"generate_release_notes\":false}"

The highlighted sections need to be replaced with the parameters for your GitHub account and repo.

In Microsoft Dynamics 365 Business Central, What is a Company and What is an Environment

Microsoft Dynamics 365 Business CentralSometimes terminology can be benefit from being explained. There are two concepts for Dynamics BC which, in the short time I’ve worked with Dynamics BC, I have had to discuss with a client.

These terms are company and environment.

In simplistic terms, a company is a container which holds all information (setup, master and transactional data) for a legal entity. If we have a company called Cronus which has operations in England and Scotland, they might create two companies as there are two legal entities which operate under different legal jurisdictions.

These two companies would exist in the same environment. Environments are used to separate production systems from development or testing systems. While you can have a test company on the production system, there is a risk that emails could be sent from the test company to a live client.

To mitigate this risk, Dynamics BC allows the creation of a sandbox environment which allows for testin of new processes or features without risking the live system.

Multiple environments might also be used if you have mutiple companies operating in multiple countries as an environment is liked to a country (England and Scotland, which I mentioned earlier, are a special case as they are both part of the UK, which Dynamics BC would regard as one country).

When you sign up to Dynamics BC for a trial there is one environment and two companies automatically created; a Cronus sample company with sample data and a new one called My Company which is a blank company.

If you have more than one environment you need to specify the environment you want to access during login.

Get Serial Number Count and Length in Microsoft Dynamics GP

Microsoft Dynamics GPI needed to check how many serial numbers were assigned to sales transactions and the cumulative length of them. I’m not aware of any function in Microsoft Dynamics GP which would give me this information, so I wrote the below SQL statement to return both values along with the transaction type and document number.

It selects from the Sales Serial/Lot Work and History (SOP10201) table which, allowing for a simple statement, includes both the work and history data (SOP transactions don’t have a status of open).

/*
Created by Ian Grieve of azurecurve | Ramblings of an IT Professional (http://www.azurecurve.co.uk) This code is licensed under the Creative Commons Attribution-NonCommercial-ShareAlike 4.0 International (CC BY-NC-SA 4.0 Int). */
SELECT SOP.SOPNUMBE AS 'SOP Number' ,SOP.SOPTYPE AS 'SOP Type' ,SOP.LNITMSEQ AS 'Line Item Sequence' ,COUNT(1) AS 'Serial Number Count' ,SUM(LEN(SOP.SERLTNUM)) AS 'Serial Number Length' FROM SOP10201 AS SOP -- Sales Serial/Lot Work and History (SOP10201) GROUP BY SOP.SOPNUMBE ,SOP.SOPTYPE ,SOP.LNITMSEQ ORDER BY SUM(LEN(SOP.SERLTNUM)) DESC

Show Bookmarks in Word

Microsoft OfficeBookmarks are not shown in Microsoft Word by default; this minimises the risk of someone accidentally deleting or changing a bookmark. However, sometimes you do need to make them visible.

I had to do this recently, but really had difficulty finding the setting.

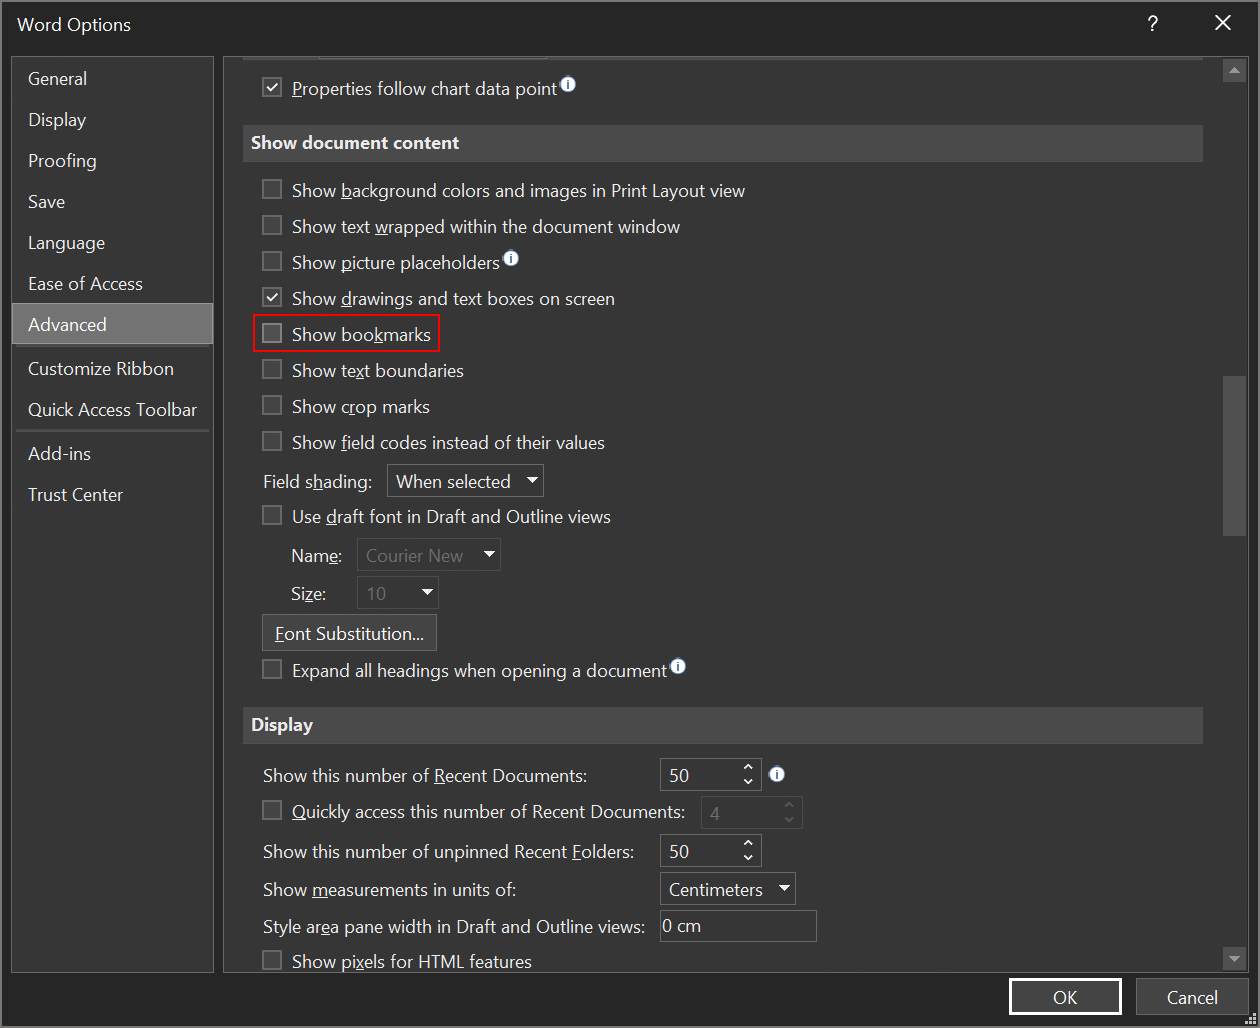
To enable the display of bookmarks, click on File and select Options.

In the Word Options window, select Advanced and scroll down to Show document content; the fifth setting down is Show bookmarks. Mark this setting and click OK:

Word options

Fixed Asset Depreciation Not Calculating in Microsoft Dynamics GP

Microsoft Dynamics GPI was on a call with a client the other day looking at a few issues with them in Microsoft Dynamics GP. One of the issues was that they had been setting up the Fixed Asset Management module, but when they ran depreciation, nothing happened.

We did some exploring and the only difference I could find, from who I would have normally configured the module, was that the Fixed Asset Calendar ((Financial » Setup » Fixed Assets » Calendar)) had been configured only for the required years starting in 2020; I usually set it up for a 200 year period.

The first asset being setup was dated in period 12 of 2020 so there is no logical reason why prior years should be needed. However, after we added 2019 into the calendar and re-ran the depreciation, all of the assets depreciated correctly.

Installing Microsoft Dynamics 365 Business Central 2022 Wave 1 On-premise Demo: Client Login

Microsoft Dynamics 365 Business CentralThis post is part of the Installing Microsoft Dynamics 365 Business Central 2022 Wave 1 On-premise Demo series in which I am creating a demo series for learning/demonstrating Business Central.

With the Business Central demo environment installed we can now log in for the first time which you will need to do using the account which did the installation.

While Business Central is not a desktop application, the server will have a shortcut added to the Windows Start menu for the web client:

Windows Start menu

Continue reading “Installing Microsoft Dynamics 365 Business Central 2022 Wave 1 On-premise Demo: Client Login”

Git Command Line Snippets: Add, Commit and Push Changes

GitHubThis post is part of the series on Git Command Line Snippets where I am taking a look at performing actions on GitHub using the git command line.

There are three steps required to add your changes to a GitHub repository:

  1. Add
  2. Commit
  3. Push

Fistly, you need to add your changes; it is possible to only add specific files, but in my case I always want to add everything; this command will add all changes including added changed or deleted files and folders:

git add --all

Once you have added the changes, you need to commit them; you can supply a commit message, but this should be a maximum of 55 characters.

git commit -m "Release for x and y"

Once you have committed the changes, you need to push them to GitHub for them to appear in the repository:

git push

Git Command Line Snippets: Choose Repository

GitHubThis post is part of the series on Git Command Line Snippets where I am taking a look at performing actions on GitHub using the git command line.

I am new to working with the git command line so have spent a bit of time reading articles. One thing a lot of them say is to “choose your repository” and then tell you to run commands. When I was doing this it was a bit late and I’d been working all day (getting my excuse in early), but I didn’t immediately understand what they meant.

All it means when they say to choose your repository, is to navigate the command prompt to the repository folder on your computer.

In command line you can simply use cd followed by the path: to navigate to the required folder

cd C:\Users\azurecurve\Documents\Development\ClassicPress Development\azrcrv-smtp

In PowerShell you can largely do the same thing but must wrap the path in double quotes if the path contains a space:

cd "C:\Users\azurecurve\Documents\Development\ClassicPress Development\azrcrv-smtp"

Installing Microsoft Dynamics 365 Business Central 2022 Wave 1 On-premise Demo: Server Installation

Microsoft Dynamics 365 Business CentralThis post is part of the Installing Microsoft Dynamics 365 Business Central 2022 Wave 1 On-premise Demo series in which I am creating a demo series for learning/demonstrating Business Central.

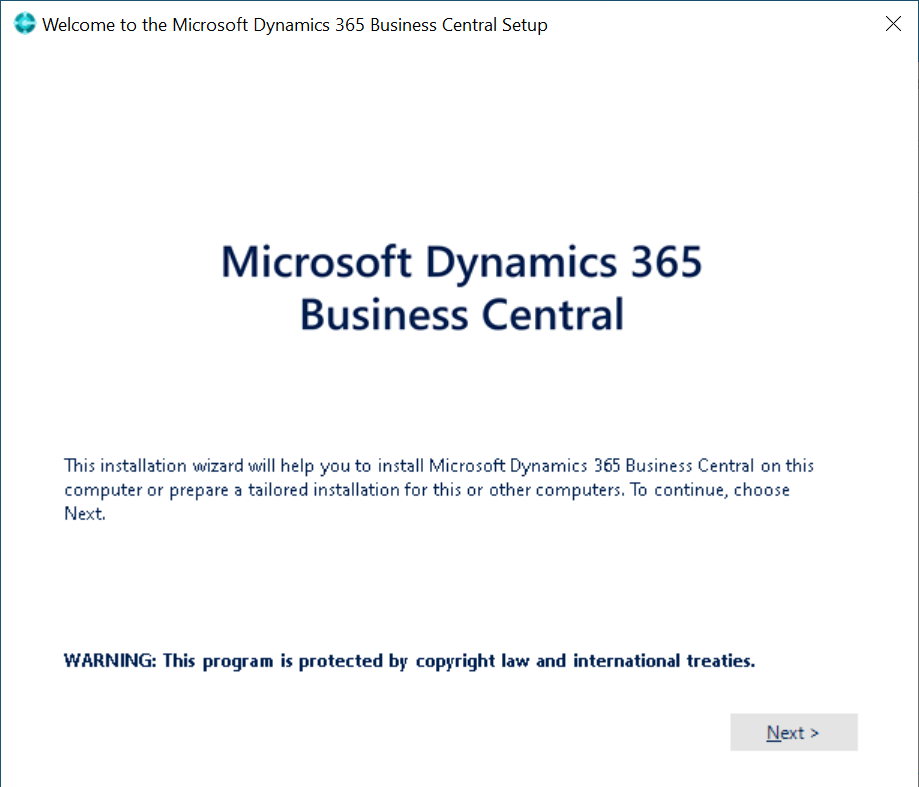
Once you have downloaded the media, extract the files and launch the setup utility. On the Welcome step, click Next:

Welcome to the Microsoft Dynamics 365 Business Central Setup

Continue reading “Installing Microsoft Dynamics 365 Business Central 2022 Wave 1 On-premise Demo: Server Installation”

Installing Microsoft Dynamics 365 Business Central 2022 Wave 1 On-premise Demo: Download Software

Microsoft Dynamics 365 Business CentralThis post is part of the Installing Microsoft Dynamics 365 Business Central 2022 Wave 1 On-premise Demo series in which I am creating a demo series for learning/demonstrating Business Central.

When I first downloaded Business Central, I had a false start as I found a page of download oinks on the Microsoft Docs website, but the latest version on there was 2020 Wave 2. I assumed this was the latest release avaiable as on-premise, but later found other download links which had the Release 2022 Wave 1 download.

I’m not sure why Microsoft switched the download locations, but the new location only appears discoverable via a web search and not browsing from the Microsoft Docs site where the rest of the Business Central documentation is located.

When you click download, you get to choose a language to download; I opted for the UK language version which is Dynamics.365.BC.38230.GB.DVD.zip.