 This post is part of the In Microsoft Dynamics 365 Business Central (Administration), how do I… series and of the wider In Microsoft Dynamics 365 Business Central, how do I… series which I am posting as I familiarise myself with Microsoft Dynamics 365 Business Central.
In this series’ last article, I introduced the different types of pages used within Dynamics BC. I thought it might be useful to give a run through of how to use each of the pages, starting with the list pages.
A list page presents a view of data from a table and allows you to interact with the date; list pages are used for both card/master data and transactional data.
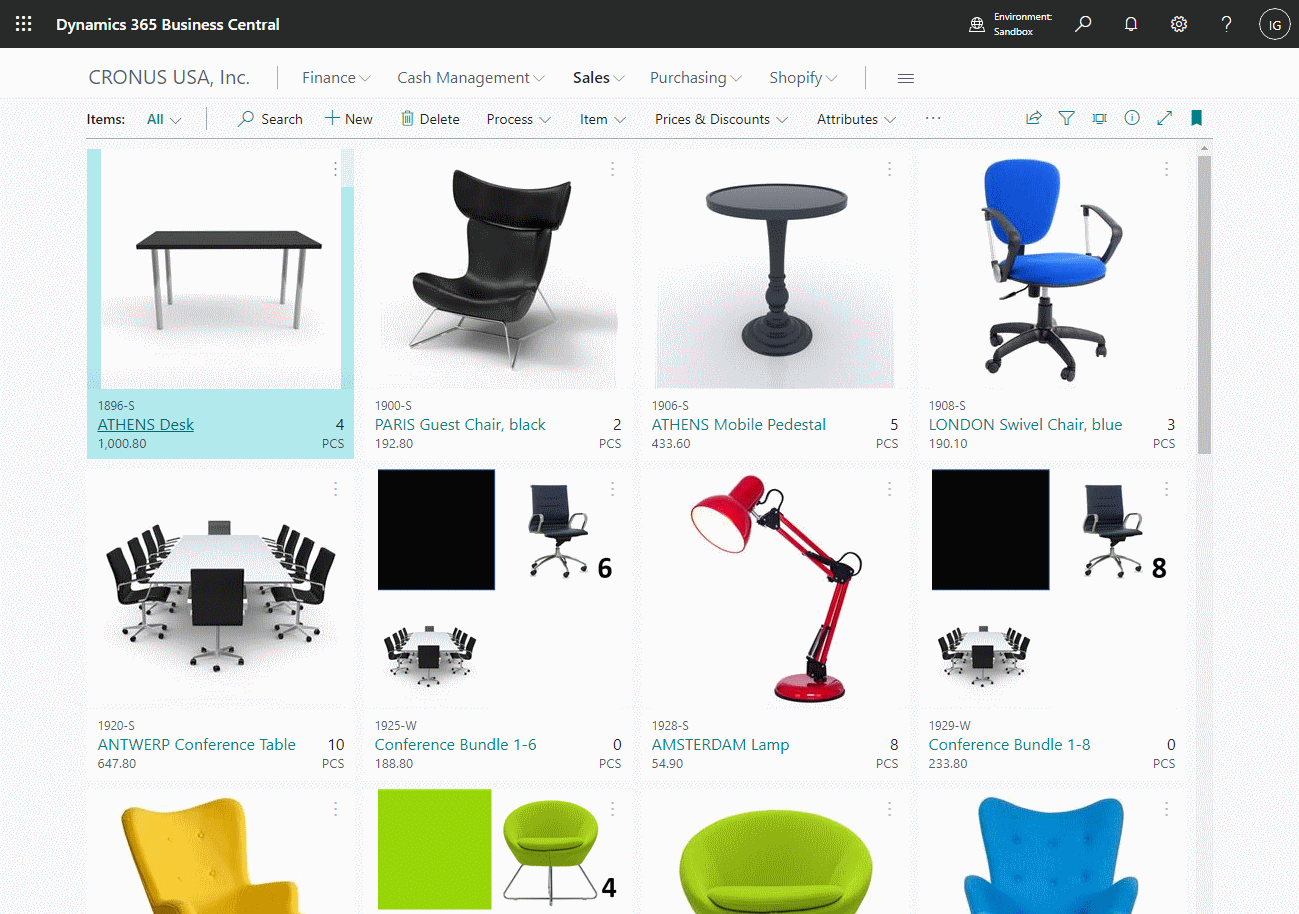
I am going to show a few of the ways in which you can interact with the data on a list page, using items as the example, but what I’ll show applies to all types of list page, whether card or transactional. Each list page will have a default view, which for items is Tile which shows a few pieces of information along with the associated image of the item.
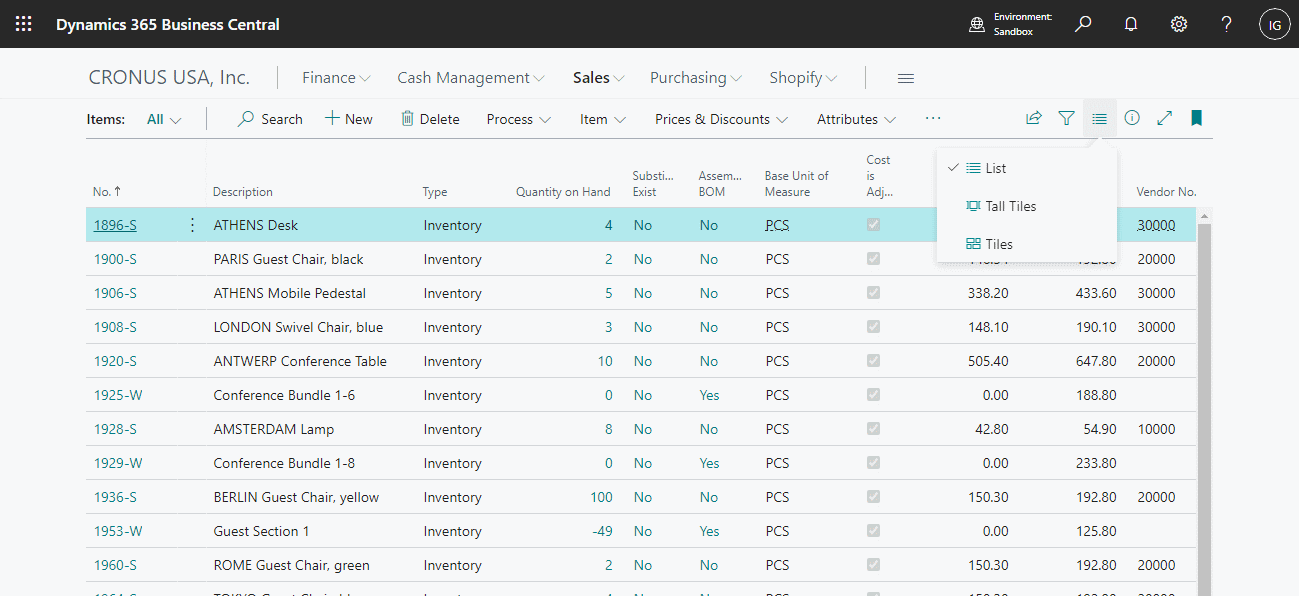
If you click the fourth button from the right on the action bar, you can toggle the view to Tall Tile or the much more useful List:
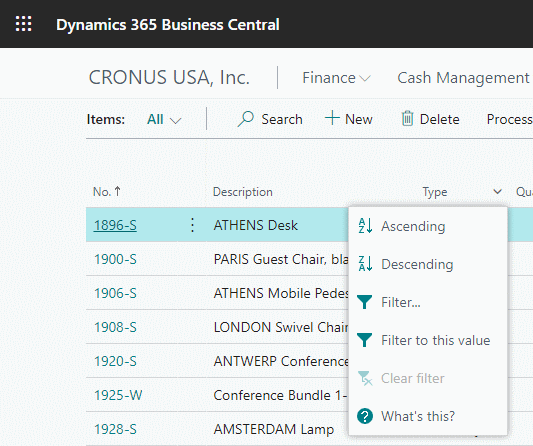
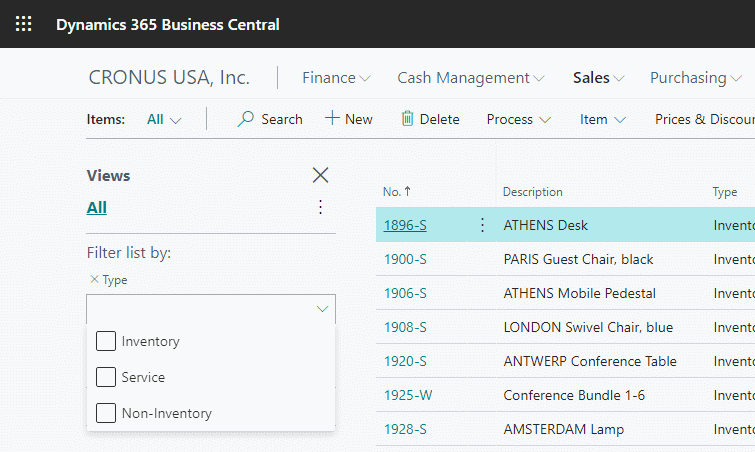
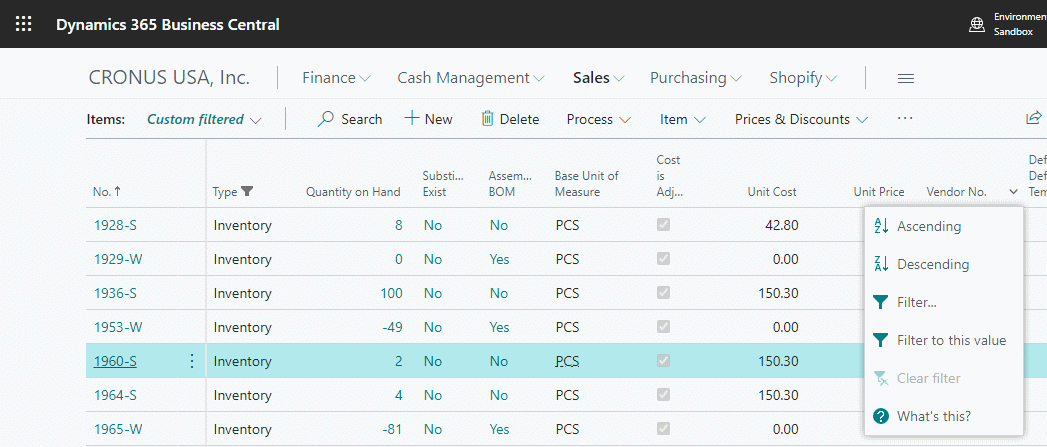
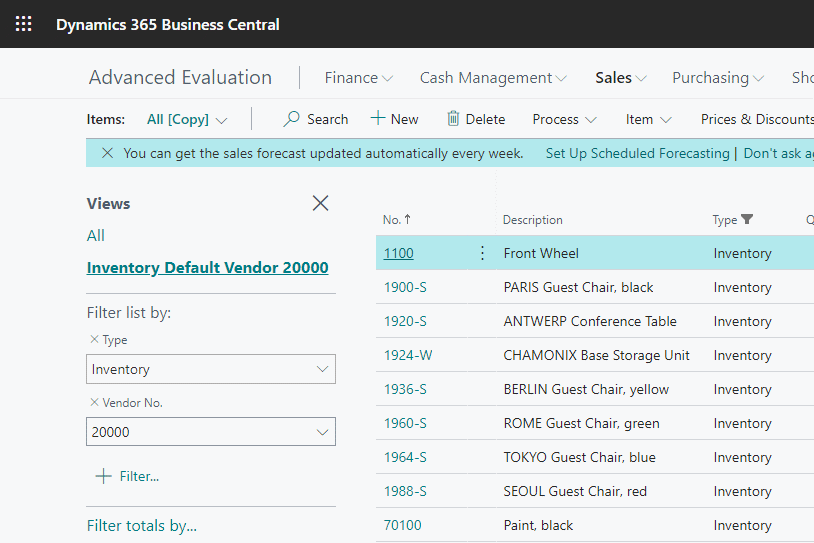
It is the list view which exposes much of the functionality which makes the list page very useful. In list view we can click hover over a column header and click the arrow which appears to open the context menu; from here we can choose to sort the column ascending/descending or we can choose to apply a filter, which will open the sidebar:
Depending on the type of field you are filtering by you can either select from the available checkboxes, select a date or type the required value; the view is filtered as soon as yo have made your selected and will change each time you change the filter value:
You Can click the + Filter button in the sidebar to add additional filters or you can select filter by from the column headers to add additional filters.
In addition, you can also select a row and from the column header select Filter to this value and the value from the selected row will be added to the filters:
If you hover over a field underlined with a dashed line, a popup appears with additional information and a hyperlink allowing you to drill down to the record:
When you have applied the filters you want, you can click the “save as” icon on the sidebar and save the list as a view with a name for easy recall in future, which will save you time by not having to set the filters up again:
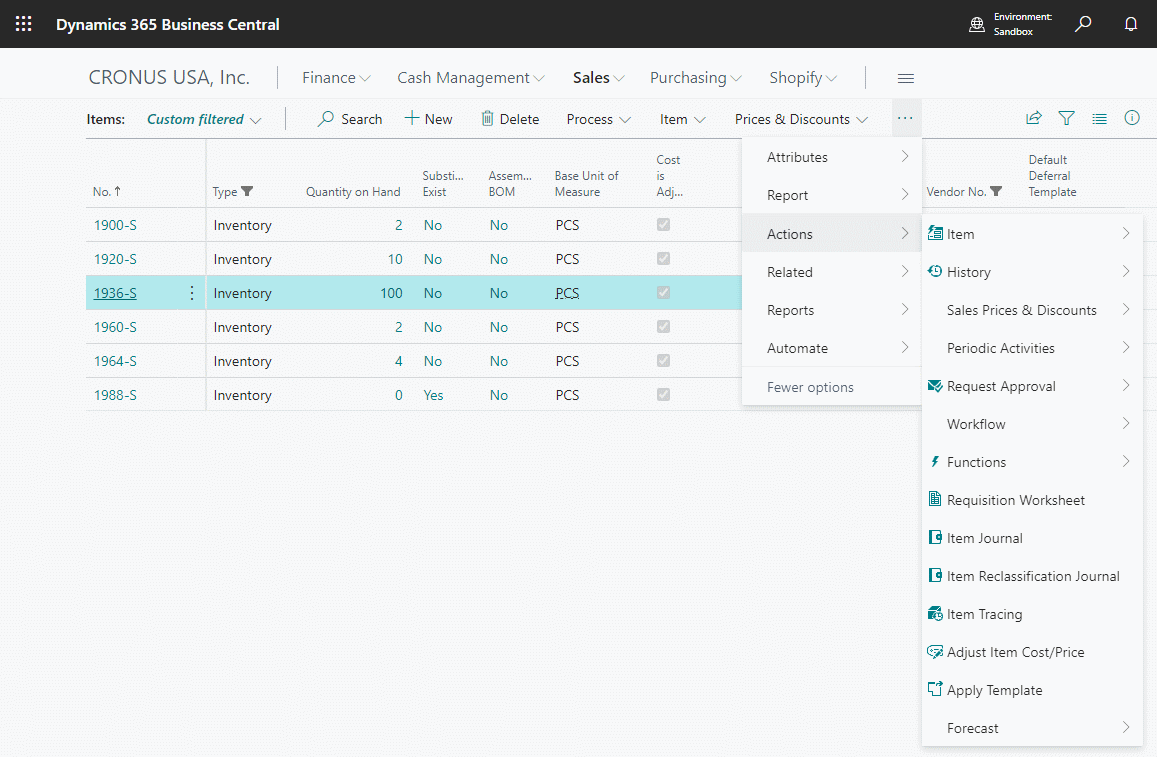
From the action bar there is a range of options available, which will vary depending on the list page being viewed:
Actions will likely include creating a new record, search and several buttons which will open up a secondary bar with additional buttons.
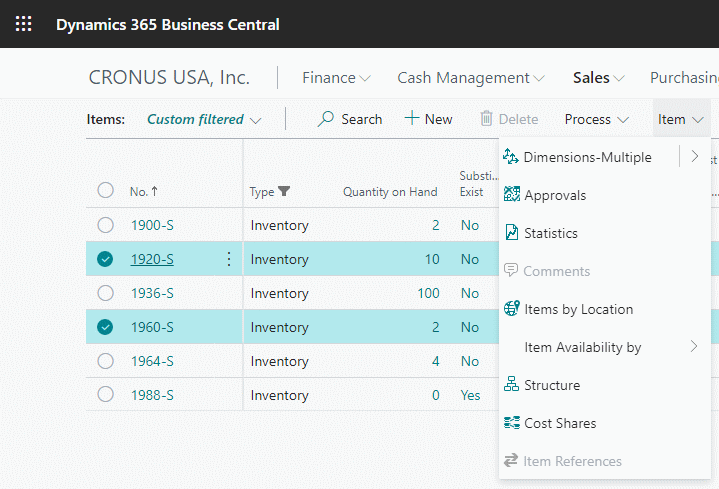
You can select multiple rows in the list page by clicking the three vertical dots button next to the ID field and clicking Select more or by holding down the Ctrl button while clicking rows with your mouse.
With multiple rows selected, some of the options on the action bar will be disabled, as they are only setup for when one row is selected:
From the action bar you can also do such tasks as search for data, create new records or delete existing records, assuming the business logic allows for deletion.
When working with Dynamics BC, you will sped quite a bit of time working with list pages and the data they contain, so it is worth taking a little time to get familiar with how they work and what options are available.
One final, and rather important, action you can take on a list page is to click on the solid underlined key field which will drill you down to the card page where you can maintain the record. This opens the same card page as clicking the New button.
In Microsoft Dynamics 365 Business Central, how do I…
What should we write about next?
If there is a topic which fits the typical ones of this site, which you would like to see me write about, please use the form, below, to submit your idea.





3 thoughts on “In Microsoft Dynamics 365 Business Central (Administration), how do I… Use List Pages”