 This post is part of the In Microsoft Dynamics 365 Business Central (Administration), how do I… series and of the wider In Microsoft Dynamics 365 Business Central, how do I… series which I am posting as I familiarise myself with Microsoft Dynamics 365 Business Central.
In the previous post on seting an update date, I briefly mentioned an “update window”, but didn’t go into any detail. Well, in addition to being able to set an update date which is the earliest date the update will be applied you can also define an update window which is the times between which the update will be installed, once the update date has been reached. The update window allows you to specify times when your system will not be in active use, such as overnight, to allow updates to be applied without disrupting your users.
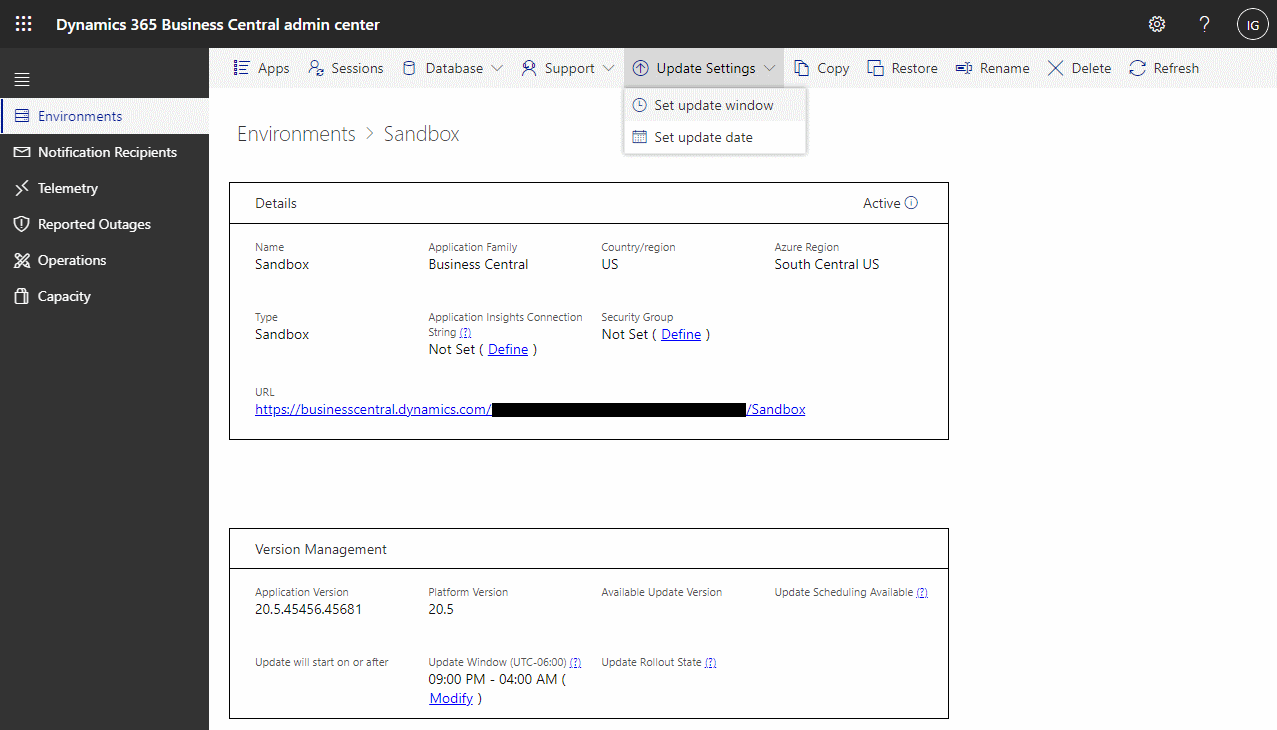
Like the update date, the update window is set in the Dynamics BC Admin Center. When you access the admin center, you’ll see your environments listed; click the name of the one you want to set an update window for (you will need to repeat if you have multiple environments):
Once you’ve selected an environment click the Update Settings button on the action bar and select Set update window:
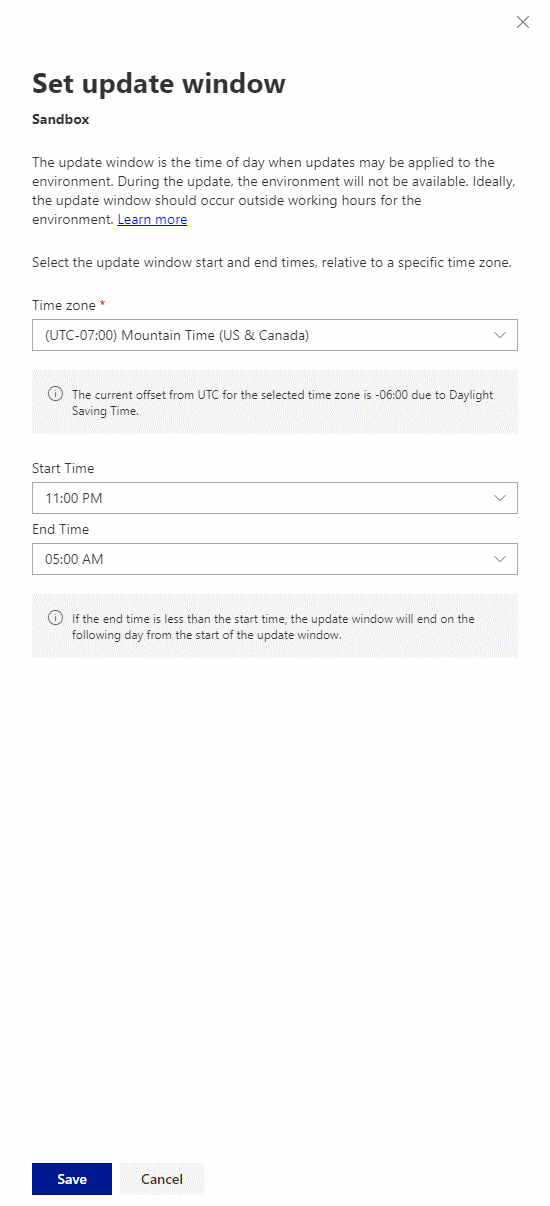
The Set update window sidebar will open allowing you to pick a Time zone as well as Start Time and End Time for the update window; the start and end time must have at leats six hours between them to allow enough time for the update to be applied:
Once happy, click the dark blue Save button at the bottom of the sidebar.
In Microsoft Dynamics 365 Business Central, how do I…
What should we write about next?
If there is a topic which fits the typical ones of this site, which you would like to see me write about, please use the form, below, to submit your idea.


