ClassicPress Plugin Development: Add Plugin Options Page to Security Main Menu

ClassicPress PluginsThis post is part of the ClassicPress Plugin Development series in which I am going to look at both best practice for developing plugins and how I approach some requirements as well as some of the functions I commonly use.

When developing a plugin, it is usual to create an options page to allow users to configure the plugin. The most common way of making the plugin options page available to users is to add it to the Settings menu in the admin dashboard; however, ClassicPress has a Security menu available which allows security plugins to be separated from the other settings on a site. This Security menu does not exist in WordPress so if you’re writing a plugin to be compatible with both ClassicPress and WordPress you will need to manage this when adding the options page.

This is done using the add_security_page function available with ClassicPress.

add_security_page(string $page_title, string $menu_title, string $menu_slug, callable $function = '')

Parameters

$page_title (string) (Required) The text to be displayed in the title tags of the page when the menu is selected. $menu_title (string) (Required) The text to be used for the menu. $menu_slug (string) (Required) The slug name to refer to this menu by (should be unique for this menu); must match an active plugin or mu-plugin slug.. $function (callable) (Optional) The function to be called to output the content for this page. Default value: ''

Return

(string|false) The resulting page's hook_suffix, or false if the user does not have the capability required.

The function above is made accessible using the add_action function along with a admin_menu tag.

The below is an example, including check for the security menu being available, of an options page using my vendor prefix of azrcrv and a plugin identifer of XXXX:

add_action('admin_menu', 'azrcrv_XXXX_add_options_page');

function azrcrv_XXXX_add_options_page() {
	if (function_exists('add_security_page')){
		add_security_page( 
			esc_html__('XXXX Options', 'text-domain'),
			esc_html__('XXXX', 'text-domain'),
			dirname(plugin_basename(__FILE__ )),
			'azrcrv_XXXX_display_options_page'
		);
	}else{
		// add options in WordPress compatible way; possibly using the add_options_page function.
	}
}

If the menu being added is for a network, rather than individual site, the $tag would be network_admin_menu instead of admin_menu.

When an options page is added to the Security menu, a plugin action link is automatically added:

Security plugin action link example

Click to show/hide the ClassicPress Plugin Development Series Index

ClassicPress Plugin Development: Add Plugin Options Page to Settings Main Menu

ClassicPress PluginsThis post is part of the ClassicPress Plugin Development series in which I am going to look at both best practice for developing plugins and how I approach some requirements as well as some of the functions I commonly use.

When developing a plugin, it is usual to create an options page to allow users to configure the plugin. The most common way of making the plugin options page available to users is to add it to the Settings menu in the admin dashboard.

This is done using the add_options_page function available with ClassicPress.

add_options_page(string $page_title, string $menu_title, string $capability, string $menu_slug, callable $function = '', int $position = null)

Parameters

$page_title (string) (Required) The text to be displayed in the title tags of the page when the menu is selected. $menu_title (string) (Required) The text to be used for the menu. $capability (string) (Required) The capability required for this menu to be displayed to the user. $menu_slug (string) (Required) The slug name to refer to this menu by (should be unique for this menu). $function (callable) (Optional) The function to be called to output the content for this page. Default value: '' $position (int) (Optional) The position in the menu order this item should appear. Default value: null

Return

(string|false) The resulting page's hook_suffix, or false if the user does not have the capability required.

The function above is made accessible using the add_action function along with a admin_menu tag.

The below is an example of an options page using my vendor prefix of azrcrv and a plugin identifer of XXXX:

add_action('admin_menu', 'azrcrv_XXXX_add_options_page');

function azrcrv_XXXX_add_options_page() {
    add_options_page( 
        esc_html__('XXXX Options', 'text-domain'),
        esc_html__('XXXX', 'text-domain'),
        'manage_options',
        dirname(plugin_basename(__FILE__ )),
        'azrcrv_XXXX_display_options_page'
    );
}

If the menu being added is for a network, rather than individual site, the $tag would be network_admin_menu instead of admin_menu.

Click to show/hide the ClassicPress Plugin Development Series Index

ClassicPress Plugin Development: Create a Plugin Action Link

ClassicPress PluginsThis post is part of the ClassicPress Plugin Development series in which I am going to look at both best practice for developing plugins and how I approach some requirements as well as some of the functions I commonly use.

When developing a plugin with an settings page, it is quite common to add a link to the settings page on the Plugins page; these links are known as plugin action links. This is an example from my URL Shortener plugin:

URL Shortener action link

The plugin action link can be added by using the add_filter function:

add_filter(string $tag, callable $function_to_add, int $priority = 10, int $accepted_args = 1)

The $tag to use is plugin_action_links, the $function_to_add is the function you need to write to add the link and the accepted_args is 2

Below is an example of the filter using the plugin_action_links tag to add the link to the URL Shortener plugin’s settings page:

add_filter('plugin_action_links', 'azrcrv_urls_add_plugin_action_link', 10, 2);

The azrcrv_urls_add_plugin_action_link function called by the filter is:

/**
 * Add URL Shortener action link on plugins page.
 *
 * @since 1.0.0
 *
 */
function azrcrv_urls_add_plugin_action_link($links, $file){
	static $this_plugin;

	if (!$this_plugin){
		$this_plugin = plugin_basename(__FILE__);
	}

	if ($file == $this_plugin){
		$settings_link = '<a href="'.admin_url('admin.php?page=azrcrv-urls').'">'.esc_html__('Settings' ,'url-shortener').'</a>';
		array_unshift($links, $settings_link);
	}

	return $links;
}

The highlighted section is the menu_slug for the settings page.

Click to show/hide the ClassicPress Plugin Development Series Index

ClassicPress Plugin Development: Best Practice for Loading Styles and Scripts

ClassicPress PluginsThis post is part of the ClassicPress Plugin Development series in which I am going to look at both best practice for developing plugins and how I approach some requirements as well as some of the functions I commonly use.

Over the last few posts, I have covered how to register and enqueue scripts and styles. In the posts on loading the admin styles and scripts I mentioned a check to only load the styles and scripts when the loaded page was the settings page for the plugin.

This is the best practice approach for developing plugins for ClassicPress; only load a script or style when it is needed. This is best practice for both scripts and styles on the front-end as well as the back-end admin dashboard.

Click to show/hide the ClassicPress Plugin Development Series Index

SQL Query to get First Level Items from Microsoft Dynamics GP Manufacturing BOM

Microsoft Dynamics GPWe’re currently doing some work for a client using the Manufacturing module of Microsoft Dynamics GP and I’ve been involved in the periphery of the manufacturing element while focusing on the financial and distribution parts, but have been assisting with some reporting items. One of them was to help create a report on the Mfg BOM showing only the first level items.

The below script, against the client data, gave the result which was required:

/*
Created by Ian Grieve of azurecurve | Ramblings of an IT Professional (http://www.azurecurve.co.uk) This code is licensed under the Creative Commons Attribution-NonCommercial-ShareAlike 4.0 International (CC BY-NC-SA 4.0 Int). */
SELECT ['Mfg Order Master'].MANUFACTUREORDER_I ,['Mfg Order Master'].ITEMNMBR ,['Item Master'].ITEMDESC ,['Mfg Order Master'].ENDQTY_I ,['Inventory U of M Schedule Setup'].BASEUOFM ,['Bill Of Material Line File'].CPN_I FROM WO010032 AS ['Mfg Order Master'] --WO010032 INNER JOIN IV00101 AS ['Item Master'] --Item Master (IV00101) ON ['Item Master'].ITEMNMBR = ['Mfg Order Master'].ITEMNMBR INNER JOIN IV40201 AS ['Inventory U of M Schedule Setup'] --Inventory U of M Schedule Setup (IV40201) ON ['Inventory U of M Schedule Setup'].UOMSCHDL = ['Item Master'].UOMSCHDL INNER JOIN BM010115 AS ['Bill Of Material Line File'] --BM010115 ON ['Bill Of Material Line File'].PPN_I = ['Mfg Order Master'].ITEMNMBR

Find All Microsoft Dynamics GP Companies With Web Services Enabled

Microsoft Dynamics GPI’ve recently been doing some work with a client which necessitated the backup of all databases using the Web Services for Microsoft Dynamics GP. The easiest way to determine which databases had the web services enabled, was to run a script checking the Workflow Setup (WF00100) table.

I took a copy of my return functional currency for all companies script and amended it to look at the web services.

If the web services has never been enabled, a company won’t be returned at all other wise a 1 for active or 0 for inactive will be returned.

/*
Created by Ian Grieve of azurecurve | Ramblings of an IT Professional (http://www.azurecurve.co.uk) This code is licensed under the Creative Commons Attribution-NonCommercial-ShareAlike 4.0 International (CC BY-NC-SA 4.0 Int). */
CREATE TABLE #Workflow( INTERID VARCHAR(5) ,CMPNYNAM VARCHAR(200) ,WEBSERVICESACTIVE VARCHAR(20) ) GO DECLARE @SQL NVARCHAR(MAX) SELECT @SQL = STUFF(( SELECT CHAR(13) + 'SELECT ''' + INTERID + ''' ,''' + CMPNYNAM + ''' ,EnableWFNotifService FROM ' + INTERID + '.dbo.WF00100' FROM DYNAMICS.dbo.SY01500 FOR XML PATH(''), TYPE).value('.', 'NVARCHAR(MAX)'), 1, 1, '') INSERT INTO #Workflow EXEC sys.sp_executesql @SQL GO SELECT * FROM #Workflow ORDER BY INTERID GO DROP TABLE #Workflow GO

ClassicPress Plugin Development: Loading Back-End Scripts

ClassicPress PluginsThis post is part of the ClassicPress Plugin Development series in which I am going to look at both best practice for developing plugins and how I approach some requirements as well as some of the functions I commonly use.

jQuery itself is automatically loaded by ClassicPress so we don’t need to do anything to load this ourselves in a plugin; it is just our own jQuery script which we need to register and enqueue. There is two ways in which scripts can be loaded in a plugin; I will cover them both, but will note first of all that I typically use the second approach; there is an argument that the first approach is the “correct” one.

The first thing to do when you are loading a script is to register it. This is done using the wp_register_script function which ClassicPress provides.

Continue reading “ClassicPress Plugin Development: Loading Back-End Scripts”

ClassicPress Plugin Development: Loading Front-End Scripts

ClassicPress PluginsThis post is part of the ClassicPress Plugin Development series in which I am going to look at both best practice for developing plugins and how I approach some requirements as well as some of the functions I commonly use.

jQuery itself is automatically loaded by ClassicPress so we don’t need to do anything to load this ourselves in a plugin; it is just our own jQuery script which we need to register and enqueue. There is two ways in which scripts can be loaded in a plugin; I will cover them both, but will note first of all that I typically use the second approach; there is an argument that the first approach is the “correct” one.

The first thing to do when you are loading a script is to register it. This is done using the wp_register_script function which ClassicPress provides.

Continue reading “ClassicPress Plugin Development: Loading Front-End Scripts”

SQL View to Return Microsoft Dynamics GP Item Number Split by Hyphens

Microsoft Dynamics GPAs with most of the other views I have posted, this is one I have written a few times over the years and am now posting it to make it easy to find next time I need it.

This view returns the Item Number from the Item Master (IV00101) table split into sections by hyphens. It assumes the item number has up to three sections, but can easily be extended.

With the view deployed, it can easily be included in any reporting tool, such as SmartList Designer/Builder or a refreshable Excel Report.

/*
Created by Ian Grieve of azurecurve | Ramblings of an IT Professional (http://www.azurecurve.co.uk) This code is licensed under the Creative Commons Attribution-NonCommercial-ShareAlike 4.0 International (CC BY-NC-SA 4.0 Int). */
-- drop view if it exists IF OBJECT_ID(N'uv_AZRCRV_ItemNumberSplitByHyphens', N'V') IS NOT NULL DROP VIEW uv_AZRCRV_ItemNumberSplitByHyphens GO -- create view CREATE VIEW uv_AZRCRV_ItemNumberSplitByHyphens AS SELECT DISTINCT ITEMNMBR ,RTRIM(SUBSTRING(REPLACE(ITEMNMBR, '-', REPLICATE(' ', LEN(ITEMNMBR))), (0) * LEN(ITEMNMBR)+1, LEN(ITEMNMBR))) AS SECTION_1 ,RTRIM(SUBSTRING(REPLACE(ITEMNMBR, '-', REPLICATE(' ', LEN(ITEMNMBR))), (1) * LEN(ITEMNMBR)+1, LEN(ITEMNMBR))) AS SECTION_2 ,RTRIM(SUBSTRING(REPLACE(ITEMNMBR, '-', REPLICATE(' ', LEN(ITEMNMBR))), (2) * LEN(ITEMNMBR)+1, LEN(ITEMNMBR))) AS SECTION_3 FROM IV00101 AS ['Item Master'] WITH (NOLOCK) --Item Master (IV00101) GO GRANT SELECT ON uv_AZRCRV_ItemNumberSplitByHyphens TO DYNGRP GO

It would also be quite easy to amend the view to split out other strings based on a character using a variation of the above SQL script.

Microsoft Dynamics GP Purchasing All-In-One View Product 258 Error

Microsoft Dynamics GPI’m working on an implementation project at the moment to migrate a company from an older ERP into Microsoft Dynamics GP for an existing client using Dynamics GP and have been doing a lot of training. One area I covered was the All-in-One View enquiries in Purchasing, Inventory and Sales. After the training one of the users have exploring the system and found that the drilldown from an invoice on the Purchasing All-in-One View (Purchasing area page » Inquiries » Purchasing All-in-One View) wasn’t working.

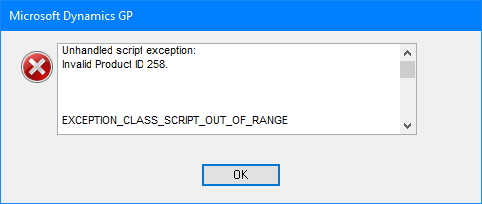
We hadn’t noticed this in training as I had used a payment and purchase order as examples of the drill down. The error the client was seeing was this:

Error Message

Unhandled script exception:
Invalid Product ID 258.

EXCEPTION_CLASS_SCRIPT_OUT_OF_RANGE
SCRIPT_CMD_CALL

It rang a bell and when I checked found a post by Mariano Gomez in 2017 where he found this error in Dynamics GP 2015 R2 and 2016 RTM; I tested and it is also in 2018 and 2018 R2, but not in 2019 or 2020.

In the comments of Mariano’s blog, someone commented that marking and unmarking the Project Accounting entry ()Project Accounting is product 258) in the Registration window (Administration area page » Setup » System » ). I tested this on my system and it did remove the error so can discuss this workaround with the client.