Implementing Fastpath’s Assure Suite: Create new portal user

FastpathThis post is part of the series on Implementing Fastpath's Assure Suite.

The management of Fastpath Assure is done through the Fastpath Assure portal (in the UK, the address is https://uk.fastpathassure.com/). The administrator account will be configured by Fastpath when the portal is created with additional users being created by that administrator.

To create a new user, log into the portal and open the Users page (Setup » Users). Existing users will be displayed; at the top of the view click the green plus icon to create a new user:

Continue reading “Implementing Fastpath’s Assure Suite: Create new portal user”

Implementing Fastpath’s Audit Trail: Transfer between systems

FastpathThis post is part of the series on Implementing Fastpath's Audit Trail and is part of the parent Implementing Fastpath's Assure Suite series.

As mentioned in a previous post, triggers are created in one company and can be deployed to other companies on the same system, but in a lot of cases, you might need to create them on a development system and then deploy them to the live one.

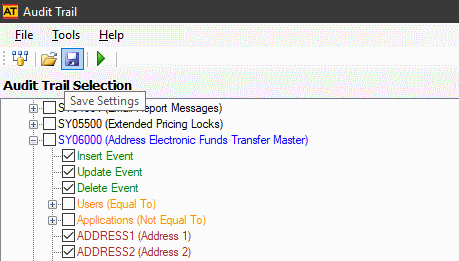
Fastpath Audit Trails does allow you to do this via the Save Settings function available as a button on the toolbar:

Save settings button

Continue reading “Implementing Fastpath’s Audit Trail: Transfer between systems”

Implementing Fastpath’s Audit Trail: Apply triggers to other companies

FastpathThis post is part of the series on Implementing Fastpath's Audit Trail and is part of the parent Implementing Fastpath's Assure Suite series.

When selecting tables to audit in Fastpath Audit Trails you are doing so in one company database. If you are working with a multi-company system you’re generally going to want to audit the same tables in all companies and setting this up manually would be very time consuming and prone to error.

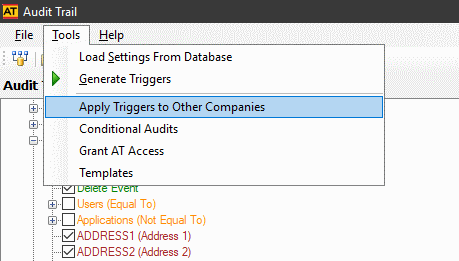
However, this is something Fastpath has thought about and included a utility to apply triggers to other databases too. To do this click (Tools » Apply Triggers to Other Companies) on the application menu:

Tools » Apply Triggers to Other Companies

Continue reading “Implementing Fastpath’s Audit Trail: Apply triggers to other companies”

Replacing ClassicPress Cron with system cron

ClassicPressClassicPress is a hard-fork of Wordpress 4.9 and has the same functionality as that version of WordPress although version 2 of ClassicPress is on the way, which is where changes will start to be introduced.

Some of my sites have been experiencing a growing number of visitors to the point where it is starting to cause problems. The reason for the problems is that the built-in ClassicPress cron handler (WP-Cron) is not a real cron job, but a mimic. And an inefficient one at that.

On high traffic sites this cron-mimic can cause performance problems. A normal system cron job will run continuously and trigger at the scheduled times, but WP-Cron does not run continuously. Instead, it fires on every page load which is where the performance problems can come in; if there are not sufficient PHP workers for the requested processes, a request will be initiated and wait until the next worker comes available. There is also an issue on low traffic sites that a scheduled task won’t start until a page is loaded.

It is recommended that the WP-Cron job be disabled and a system job created and run on a pre-defined schedule.

Disabling WP-Cron is easy to do; edit your wp-config.php file and add the following code above the /* That's all, stop editing! Happy blogging. */ line:

/** Disable cron. */
define('DISABLE_WP_CRON', 'true');

You then need to create the system cron job; the format of this may vary depending on your host. This is the one which works for my host:

cd ${HOME}/public_html; /usr/local/bin/php -q wp-cron.php

Two possible variations are:

cd /home/{username}/public_html; php -q wp-cron.php
php -q /home/{username}/public_html/wp-cron.php

For my main sites I have set the cron to once every hour, but on less trafficked sites I’ve opted for once or twice a day or week.

azurecurve ClassicPress Plugin: Get GitHub File

ClassicPress PluginsThis is part of the which introduces the plugins I have available for ClassicPress.

The plugin I am going to cover in this post, is a brand new one written for ClassicPress; Get Github File.

Functionality

Gets the content of a file from a GitHub repository and outputs using a shortcode.

Settings allow default options, such as author, folder, filename to be specified. Additional options to allow the removal or conversion of WordPress headers in readme.txt files.

Available shortcode parameters:

  • account – account on GitHub
  • branch – branch to get file from
  • folder – folder containing the file
  • file – file to get from GitHub repository
  • repository – name of GitHub repository
  • startfrom – text in file to start outputting from (e.g. # Description)
  • htmlastext – 1 to output HTMl as text and 0 to output as HTML
  • shortcodesastext – 1 to output shortcodes as text and 0 to output as shortcode
  • wordpresstitles – remove/ignore/convert

All parameters except repository can be defined as defaults in settings.

Output is in markdown, but use of a plugin such as Markdown by azurecurve can convert this markdown to HTML markup.

Download

The plugin can be downloaded via my Development site.

Implementing Fastpath’s Audit Trail: Apply templates

FastpathThis post is part of the series on Implementing Fastpath's Audit Trail and is part of the parent Implementing Fastpath's Assure Suite series.

A couple of psots ago I covered the creation of triggers for auditing information. This allows you to create any trigger you want, but can be a somewhat long-winded way of doing things. Fortunately, Fastpath provide a number of templates which you can apply as a shortcut.

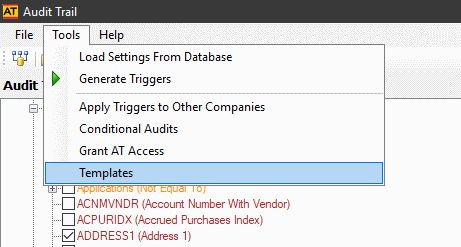
To apply a template, click (Tools » Templates) on the application menu:

Tools menu

Continue reading “Implementing Fastpath’s Audit Trail: Apply templates”

Implementing Fastpath’s Audit Trail: Create Triggers

FastpathThis post is part of the series on Implementing Fastpath's Audit Trail and is part of the parent Implementing Fastpath's Assure Suite series.

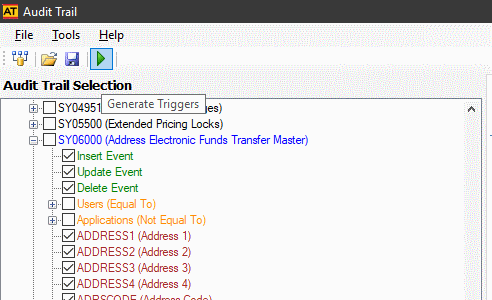
Once you have tables selected for auditing, the next step is to create the triggers in the database. To create the triggers, click the Create Triggers button on the toolbar:

Audit Trails - Create trigger button

Continue reading “Implementing Fastpath’s Audit Trail: Create Triggers”

Implementing Fastpath’s Audit Trail: Select tables to audit

FastpathThis post is part of the series on Implementing Fastpath's Audit Trail and is part of the parent Implementing Fastpath's Assure Suite series.

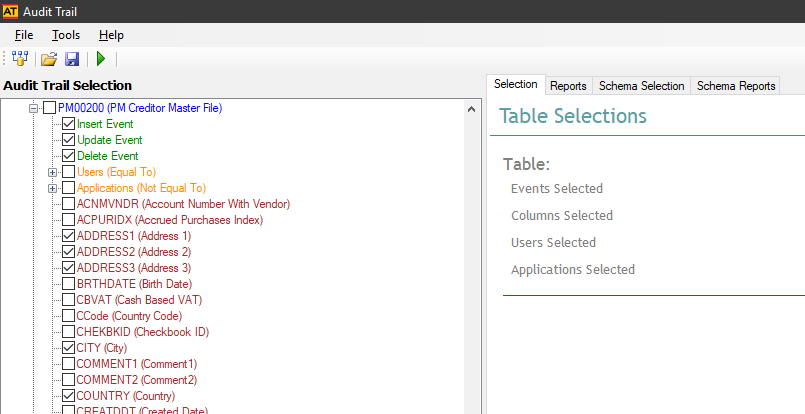
Audit Trails tracks changes by creating triggers on SQL Server. When you create the triggers you do so by selecting a table, choosing the events to track and which fields to be audited:

Audit Trails

You can separately choose to track inserts, updates and deletes by marking the relevant boxes, although in most cases you would want to track all three.

Next you can select any of the fields on the table for auditing; I’d recommend against tracking everything as this can make the audit data very large and if there are fields you don’t populate or aren’t important, then there is no point auditing them.

Likewise, you can audit as many tables as you want, but I’d recommend against auditing all tables as this can have an impact on performance. I’d also recommend against auditing transaction tables due to the volume of data which would pass through them.

In the next post, I’ll show how to apply the triggers for the selected tables and fields.

Implementing Fastpath's Audit Trail

Implementing Fastpath's Assure Suite

Implementing Fastpath’s Assure Suite
Implementing Fastpath's Assure Suite: Who are Fastpath?
Implementing Fastpath's Assure Suite: What is Assure Suite?
Implementing Fastpath's Assure Suite: Pre-installation steps
Implementing Fastpath's Assure Suite: Sign Into Support Portal
Implementing Fastpath's Assure Suite: Download Assure Suite
Implementing Fastpath's Audit Trail: Configuration
Implementing Fastpath's Identity Manager: Configure AD Settings
Implementing Fastpath's Assure Suite: Run minimum permissions script
Implementing Fastpath's Assure Suite: Install the Hybrid Connection Manager
Implementing Fastpath's Assure Suite: Configure Hybrid Connection Manager
Implementing Fastpath's Assure Suite: Setup cloud connection
Implementing Fastpath's Assure Suite: Schedule security import
Implementing Fastpath's Assure Suite: Schedule Audit Trails data collection
Implementing Fastpath's Audit Trail: Grant AT Access
Implementing Fastpath's Audit Trail: Select company to audit
Implementing Fastpath's Audit Trail: Select tables to audit
Implementing Fastpath's Audit Trail: Create Triggers
Implementing Fastpath's Audit Trail: Apply templates
Implementing Fastpath's Audit Trail: Apply triggers to other companies
Implementing Fastpath's Audit Trail: Transfer between systems
Implementing Fastpath's Assure Suite: Create new portal user
Implementing Fastpath's Assure Suite: Assign Permissions
Implementing Fastpath's Audit Trail: Ad hoc data collect
Implementing Fastpath's Audit Trail: Review data changes
Implementing Fastpath's Audit Trail: View reports

Implementing Fastpath’s Audit Trail: Select company to audit

FastpathThis post is part of the series on Implementing Fastpath's Audit Trail and is part of the parent Implementing Fastpath's Assure Suite series.

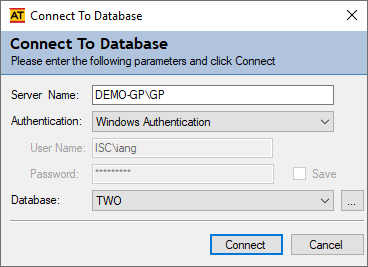
While Audit Trails allows you to audit changes to any SQL Server database. When you first log into Audit Trails you will be prompted to login and select a database:

Select company

Continue reading “Implementing Fastpath’s Audit Trail: Select company to audit”

Implementing Fastpath’s Audit Trail: Grant AT Access

FastpathThis post is part of the series on Implementing Fastpath's Audit Trail and is part of the parent Implementing Fastpath's Assure Suite series.

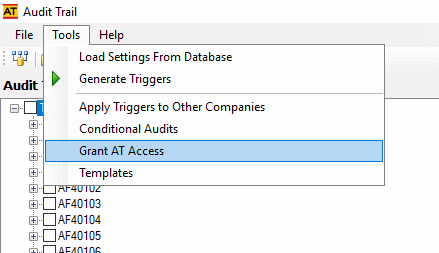
The Audit Trails software can be installed on any machines necessary and connect to the same SQL Server database. Users need to be granted access to Audit Trail in order to access the application. To do this, log into Audit Trail and click (Tools » Grant AT Access):

Tools menu

Continue reading “Implementing Fastpath’s Audit Trail: Grant AT Access”