Building The Raspberry Pi: CanaKit Raspberry Pi 3 B+ Complete Starter Kit

Raspberry PiThis post is part of the series on building my new Raspberry Pi; this series is a sub-series of the Adventures with a Raspberry Pi.

I have no prior experience dealing with the Raspberry PI, so I went the easy route and bought a starter kit from Amazon:

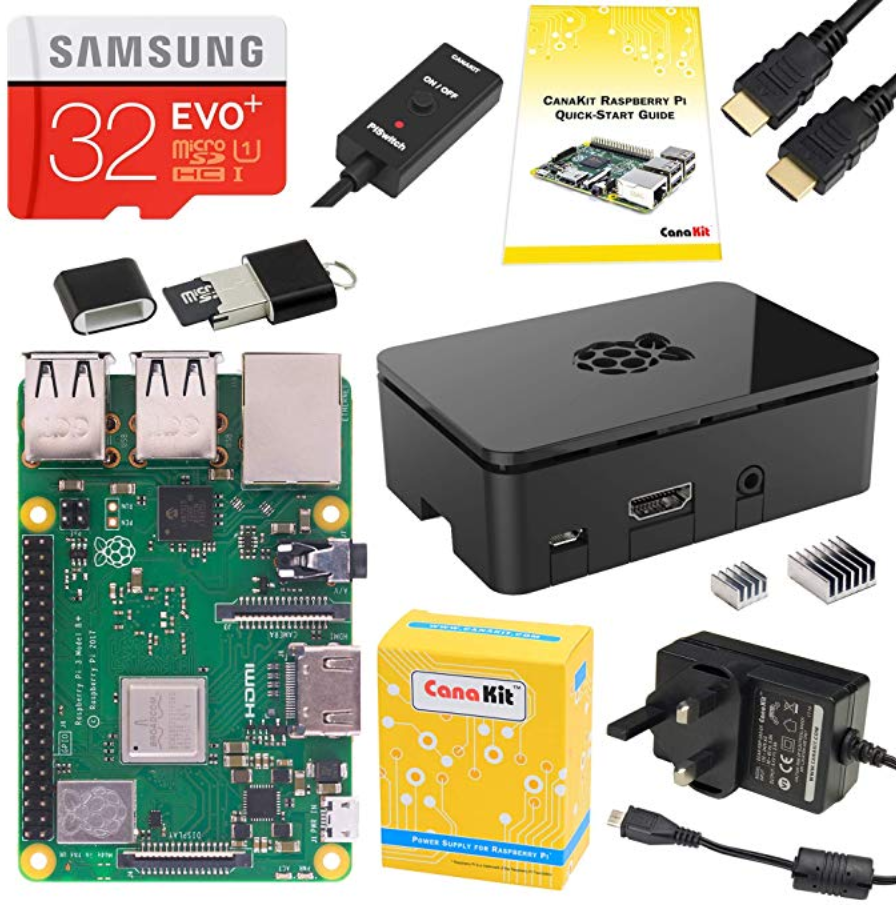
CanaKit Raspberry Pi 3 B+ (B Plus) Complete Starter Kit - UK Edition (32 GB Samsung EVO+)

This starter kit includes everything necessary for a working Raspberry PI and includes the most recent version of the Raspberry Pi itself. It includes the following:

  • Raspberry Pi 3 Model B+ (B Plus) with 1.4GHz 64-bit quad-core ARMv8 CPU (BCM2837B0)
  • 1 GB LPDDR2 SDRAM
  • On-board WiFi and Bluetooth Connectivity
  • 32 GB Samsung EVO+ Micro SD Card (Class 10) pre-loaded with NOOBS
  • USB MicroSD Card Reader
  • CanaKit 2.5A Micro USB Power Supply (UK) with Noise Filter
  • Premium Raspberry Pi 3 Case
  • High Quality HDMI Cable with CEC support (6-foot cable)
  • Set of 2 Aluminum Heat Sinks
  • GPIO Quick Reference Card
  • CanaKit Full Colour Quick-Start Guide

in the next post, I’ll be assembling the Raspberry Pi.

Adventures With A Raspberry Pi

Adventures With A Raspberry Pi
Building The Raspberry Pi: CanaKit Raspberry Pi 3 B+ Complete Starter Kit
Building The Raspberry Pi: Raspberry Pi Build
Building The Raspberry Pi: Install Operating System
Building The Raspberry Pi: First Run
Building The Raspberry Pi: System Configuration Tool
Building The Raspberry Pi: Enable SSH For Remote Access
Building The Raspberry Pi: Securing the Raspberry Pi
Building The Raspberry Pi: Conclusion
Installing Pi-hole On A Raspberry Pi: What is Pi-hole?
Installing Pi-hole On A Raspberry Pi: Install Pi-hole
Installing Pi-hole On A Raspberry Pi: Change Pi-hole Admin Password
Installing Pi-hole On A Raspberry Pi: Configure Network to use Pi-hole
Using Pi-hole On A Raspberry Pi: Blocked Adverts
Using Pi-hole On A Raspberry Pi: Admin Interface
Using Pi-hole On A Raspberry Pi: Disabling Pi-hole
Using Pi-hole On A Raspberry Pi: Whitelisting a Site
Using Pi-hole On A Raspberry Pi: Update Blocklists
Using Pi-hole On A Raspberry Pi: Maintain Blocklists
Using Pi-hole On A Raspberry Pi: Change DNS Servers
Using Pi-hole On A Raspberry Pi: Connecting With SSH
Using Pi-hole On A Raspberry Pi: Updating the Pi-hole
Using Pi-hole On A Raspberry Pi: Conclusion
What Else Can I Use It For?
Prepare New SD Card For Raspberry Pi OS: Download SD Card Formatter
Prepare New SD Card For Raspberry Pi OS: Install SD Card Formatter
Prepare New SD Card For Raspberry Pi OS: Format SD Card
Prepare New SD Card For Raspberry Pi OS: Download NOOBS
Prepare New SD Card For Raspberry Pi OS: Copy Files To The SD Card
Prepare New SD Card For Raspberry Pi OS: Conclusion
Installing Pi-hole On A Raspberry Pi: Changing the IP Address
Raspberry PI Update Fails
Check Version of OS on Raspberry Pi
How to Update the OS on a Raspberry Pi

Implementing SalesHQ Portal: Salesperson Setup

SalesHQ PortalThis post is part of a series on Implementing SalesHQ Portal, which is one of the GP Elementz Portals from my new employer, ISC Software Solutions.

With SalesHQ configured, it is now available to use. However, the first thing we need t do is grant access to salespeople so that they are able to log in.

From experience, very few clients actually use salespeople in Microsoft Dynamics GP the way it was intended. So rather than enforcing the use of them, the SalesHQ functionality has been hooked onto the Salesperson Maintenance window ()Sales » Cards » Salesperson) without requiring the salesperson to be assigned to customers.

There are two pieces of setup required against the Salesperson record:

  1. Assign the login details for the salespeople who can log in against this Salesperson record; multiple logins against a single salesperson is supported.
  2. Assign customers to a Salesperson record.

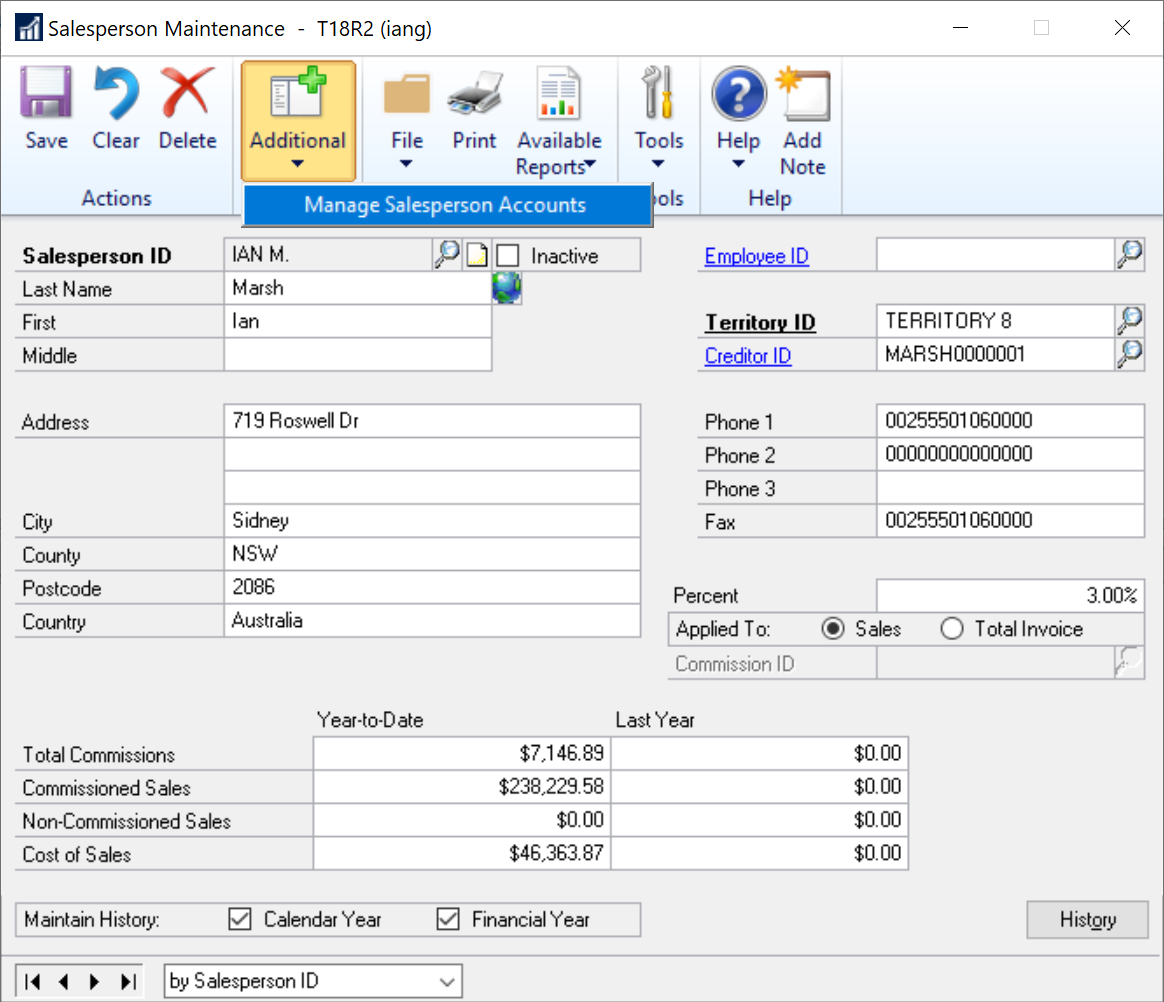
To add the users who can login, open the Salesperson Maintenance window and open a salesperson record. Click the AdditionalManage Salesperson Accounts:

Salesperson Maintenance showing the Additional button

Continue reading “Implementing SalesHQ Portal: Salesperson Setup”