Merry Christmas to everyone in the Dynamics GP community.
Month: December 2017
Hands On With MDGP 2018 RTM: Configure Web Components
 Microsoft Dynamics GP 2018 RTM has now been released. In this series of posts, I will be stepping through the installation of Microsoft Dynamics GP and additional products and then will move on to taking a look at the new functionality which has been introduced.
The series index for this series of posts is here and will automatically update as posts go live.
After adding the Web Component runtime features to the client, the next step is to install the web components themselves.
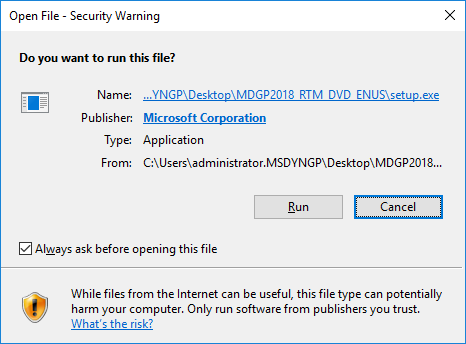
Launch the Microsoft Dynamics GP 2018 setup utility. Depending on server settings, you might receive multiple security warnings during the installation; click Run on each one as it appears:
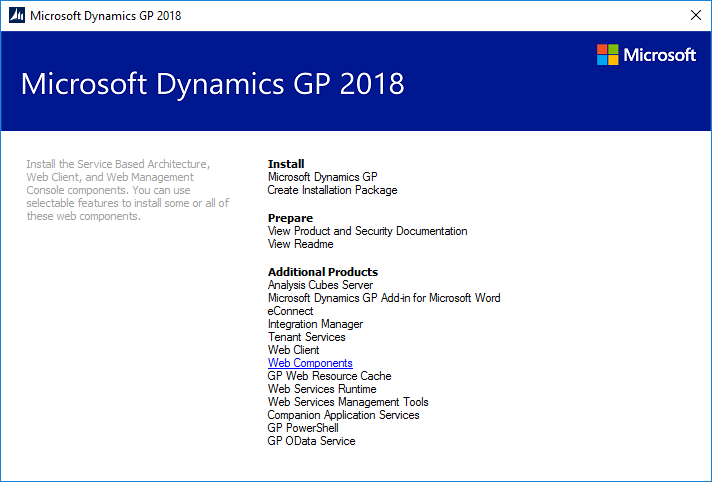
Under the Additional Products header, select Web Components and click Install on the popup menu which appears:
Continue reading “Hands On With MDGP 2018 RTM: Configure Web Components”
Hands On With MDGP 2018 RTM: Add Web Component Runtime Feature
 Microsoft Dynamics GP 2018 RTM has now been released. In this series of posts, I will be stepping through the installation of Microsoft Dynamics GP and additional products and then will move on to taking a look at the new functionality which has been introduced.
The series index for this series of posts is here and will automatically update as posts go live.
The installation of the web components is going to span across a few posts; I have already posted about the prerequisites.
The first step is to add the two features in the Microsoft Dynamics GP desktop client required for the web components. These are the Service Based Architecture and Web Client Runtime features which are added via the Programs and Features Control Panel applet.
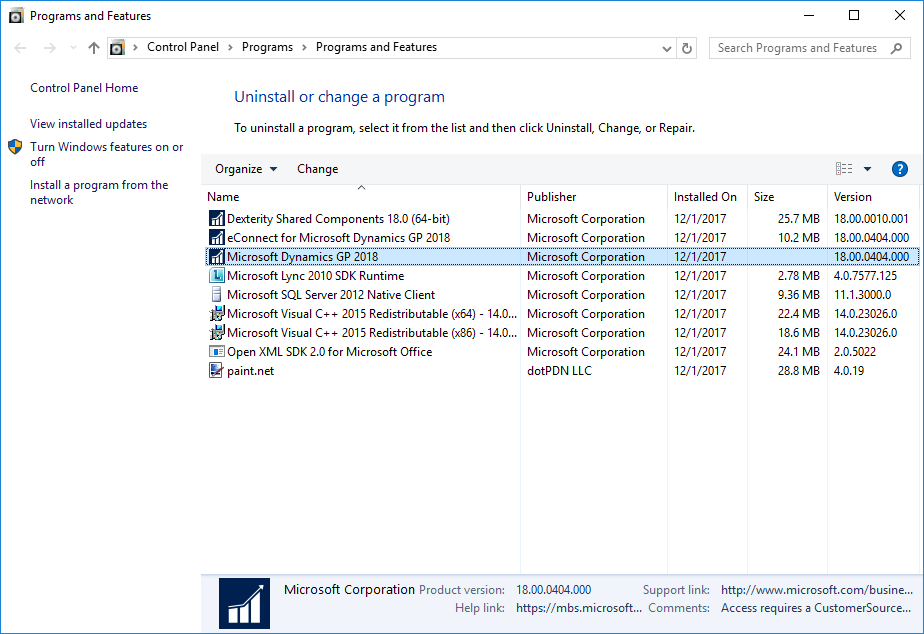
In the applet, find Microsoft Dynamics GP 2018 and click the Change button:
Continue reading “Hands On With MDGP 2018 RTM: Add Web Component Runtime Feature”
Microsoft Dynamics GP 2018 RTM Web Client Prerequisites: Bind SSL Certificate to IIS Web Site
 Microsoft Dynamics GP 2018 RTM has now been released. In a series of posts, I am be stepping through the installation of Microsoft Dynamics GP and additional products ; the series index for this series of posts is here and will automatically update as posts go live.
I am taking a small break (sort of) from that post, to cover the installation/configuration of the prerequisites for the installation of the Microsoft Dynamics GP 2018 RTM web client (the installation of which is part of the Hands On series.
This is the first of the posts on installing and configuring the web client prerequisites; in this post I am going to cover the binding of the self-signed security certificate (created in the last post).
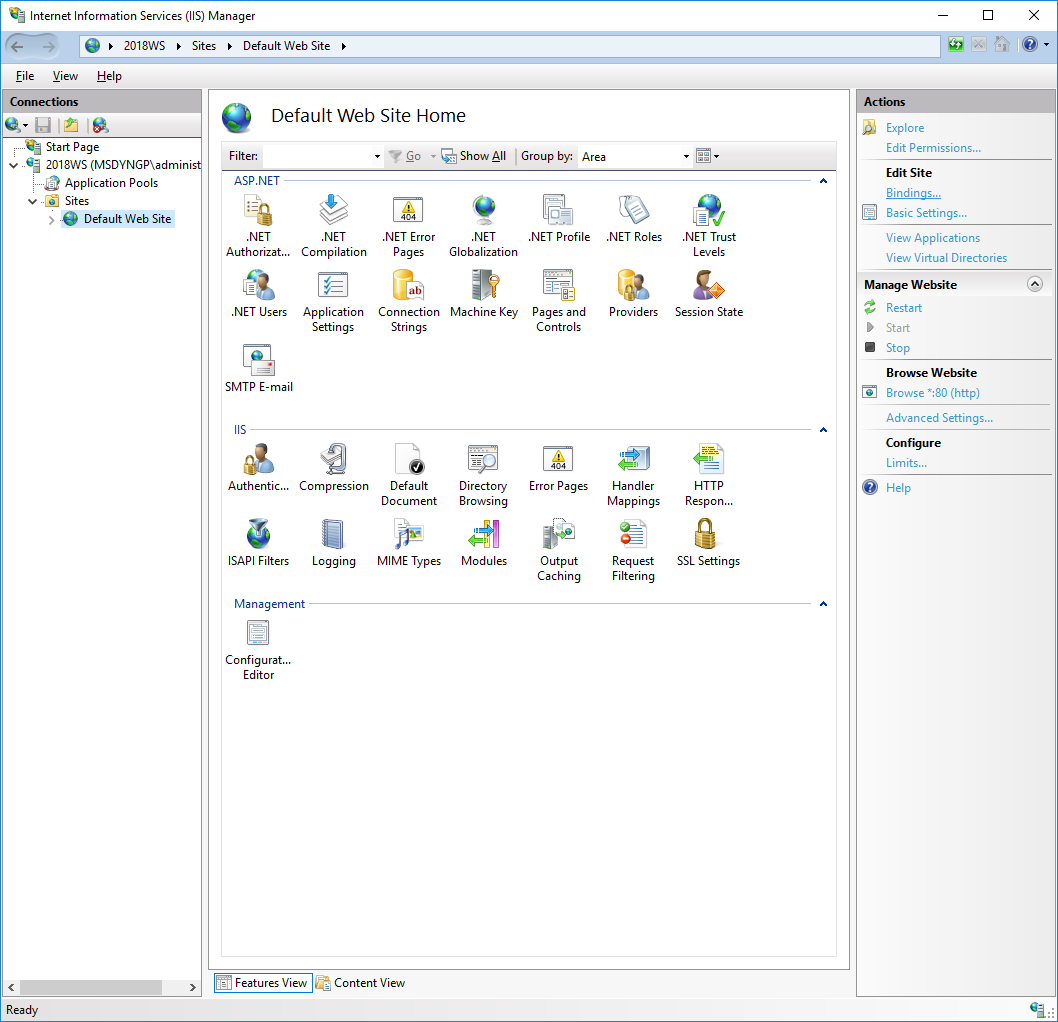
To bind the certificate, launch Internet Information Services (IIS) Manager, expand the server node, the Sites node and click on Default Web Site (I am just using the default website in IIS for the web client) and then click Bindings in the Action pane:
Microsoft Dynamics GP 2018 RTM Web Client Prerequisites: Create Self Signed SSL Certificate
 Microsoft Dynamics GP 2018 RTM has now been released. In a series of posts, I am be stepping through the installation of Microsoft Dynamics GP and additional products ; the series index for this series of posts is here and will automatically update as posts go live.
I am taking a small break (sort of) from that post, to cover the installation/configuration of the prerequisites for the installation of the Microsoft Dynamics GP 2018 RTM web client (the installation of which is part of the Hands On series).
This is the first of the posts on installing and configuring the web client prerequisites; in this post I am going to cover the creation of a self-signed security certificate.
The web client is a web based service, which requires a security certificate to be created and bound to the web site. Once IIS has been installed, it is a simple process to create a self-signed security.
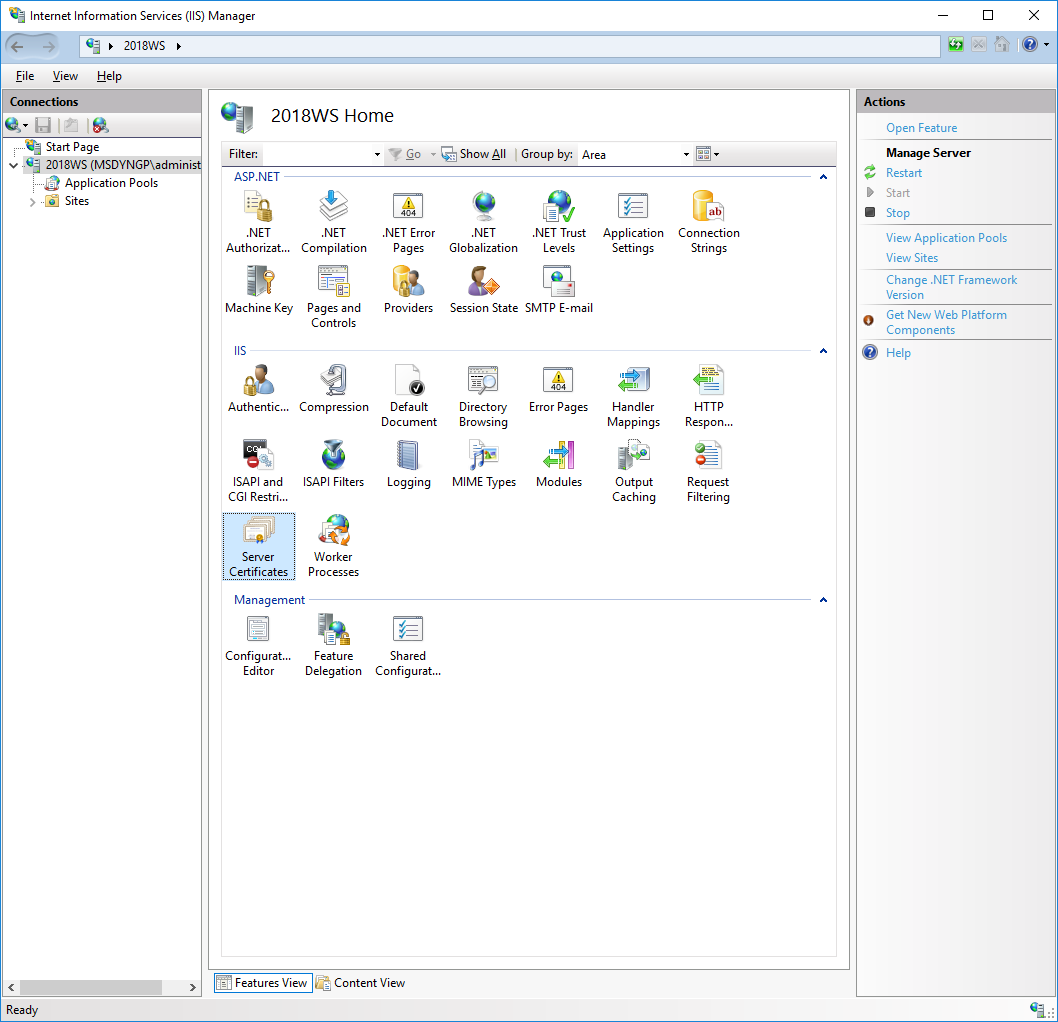
To do so, launch Internet Information Services (IIS) Manager and click on the server name in the navigation pane. in the detail pane, double click on Server Certificates:
Microsoft Dynamics GP 2018 RTM Web Client Prerequisites: Install Internet Information Services
 Microsoft Dynamics GP 2018 RTM has now been released. In a series of posts, I am be stepping through the installation of Microsoft Dynamics GP and additional products ; the series index for this series of posts is here and will automatically update as posts go live.
I am taking a small break (sort of) from that post, to cover the installation/configuration of the prerequisites for the installation of the Microsoft Dynamics GP 2018 RTM web client (the installation of which is part of the Hands On series).
This is the first of the posts on installing and configuring the web client prerequisites; in this post I am going to cover the installation of Internet Information Services (IIS).
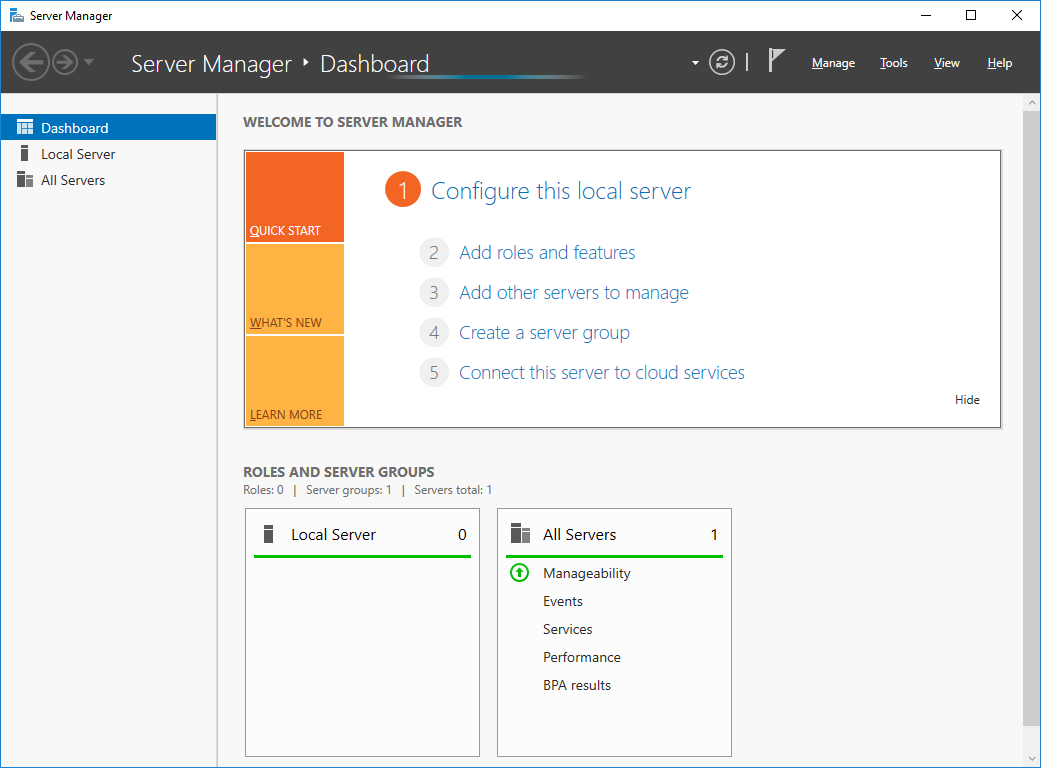
To install IIS, log onto the server and launch Server Manager. Click on Add roles and features:
Microsoft Dynamics GP 2018 RTM Web Client Prerequisites: Series Index
 Microsoft Dynamics GP 2018 RTM has now been released. In a series of posts, I am stepping through the installation of Microsoft Dynamics GP and additional products and then will move on to taking a look at the new functionality which has been introduced.
Before installing the Microsoft Dynamics GP 2018 RTM Web Client, I will be installing the prerequisites. As with the eConnect 18 Prerequisites, I am breaking out the Microsoft Dynamics GP 2018 RTM Web Client prerequisites into their own mini series. This is the series index and will automatically update as posts go live.
| Microsoft Dynamics GP 2018 RTM Web Client Prerequisites |
|---|
| Install Internet Information Services |
| Create Self Signed SSL Certificate |
| Bind SSL Certificate to IIS Web Site |
MDGP 2018 RTM Feature of the Day: One Payment Per Vendor/Invoice Setting on Vendor Card
 The Inside Microsoft Dynamics GP blog has started a series Feature of the Day posts for Microsoft Dynamics GP 2018 RTM; as the most recent versions have been, these posts are in the form of PowerPoint slides; I am reposting them here so they can be read more easily as well as adding my won commentary.
The series index for this series of posts is here.
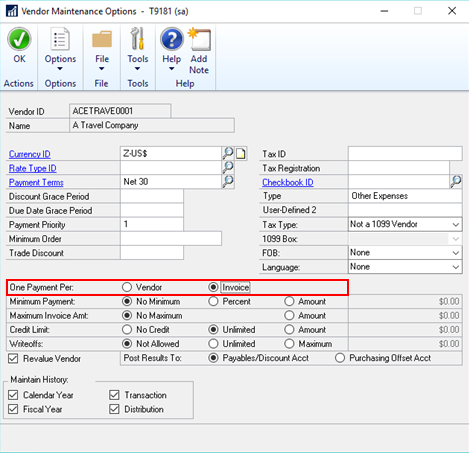
This delayed Feature of the Day (I think I missed the official post when it was posted) is One Payment Per Vendor/Invoice Setting on the Vendor Card which allows the user to decide, on a per vendor basis, if one payment should be produced per vendor or invoice:
Hands On With MDGP 2018 RTM: eConnect Incoming Queue Bug Fixed
 Microsoft Dynamics GP 2018 RTM has now been released. In this series of posts, I will be stepping through the installation of Microsoft Dynamics GP and additional products and then will move on to taking a look at the new functionality which has been introduced.
The series index for this series of posts is here and will automatically update as posts go live.
There was a bug in the Microsoft Dynamics GP 2015 and 2016 versions of eConnect whereby the Integration Service was unable to process messages from the Incoming Queue.
I’ve done some testing of this in eConnect for Microsoft Dynamics GP 2018, and I’m delighted to confirm that the bug has now been fixed. This is great news as it means we will no longer need to be installing the Incoming queue for Microsoft Dynamics GP 2013 R2.
My colleague, Laura Bowie, has also informed me that the year end updates for Microsoft Dynamics GP 2015 and 2016 has also seen this bug fixed.
Hands On With MDGP 2018 RTM: Set eConnect Incoming Queue Permissions
 Microsoft Dynamics GP 2018 RTM has now been released. In this series of posts, I will be stepping through the installation of Microsoft Dynamics GP and additional products and then will move on to taking a look at the new functionality which has been introduced.
The series index for this series of posts is here and will automatically update as posts go live.
With the eConnect Service and the eConnect Incoming Queue configured, the final step is to configure permissions of the queue to accept messages.
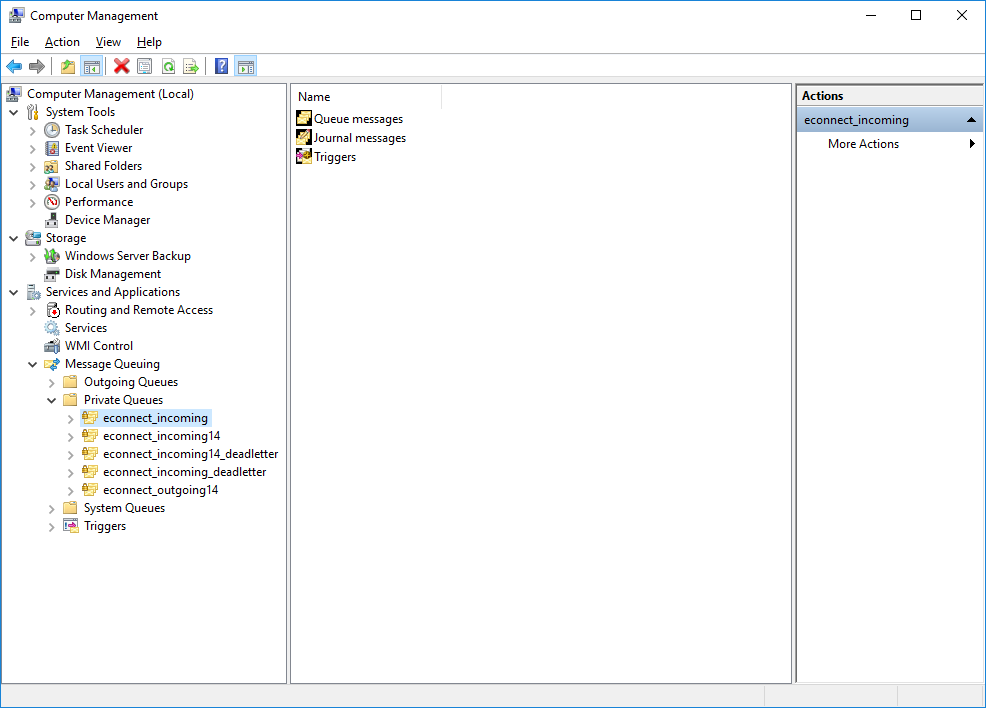
Launch Computer Management from the Control Panel on the eConnect server. Expand the following nodes:
- Services and Applications
- Message Queuing
- Private Queues
Right click on econnect_incoming and select Properties
In the Group or users names list, select Everyone and set Permissions for Everyone to Full Control. Click OK to accept the changes
Continue reading “Hands On With MDGP 2018 RTM: Set eConnect Incoming Queue Permissions”


