 With the release of Microsoft Dynamics GP 2016 R2 it’s time for a series of “hands on” posts where I go through the installation of all of it’s components; the index for this series can be found here.
In the last post, I installed the Analysis Cubes server. The next step is to configure the Analysis Cubes.
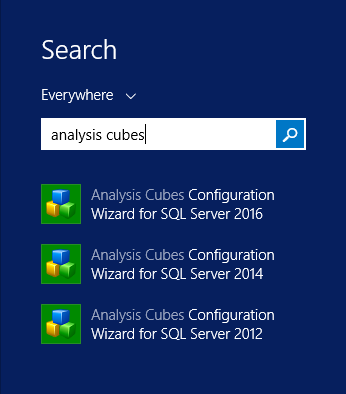
There are a choice of three Analysis Cubes Configuration Wizards available, one for each of the supported versions of SQL Server. I have selected the SQL Server 2016 version as this is the version of SQL Server I have installed:
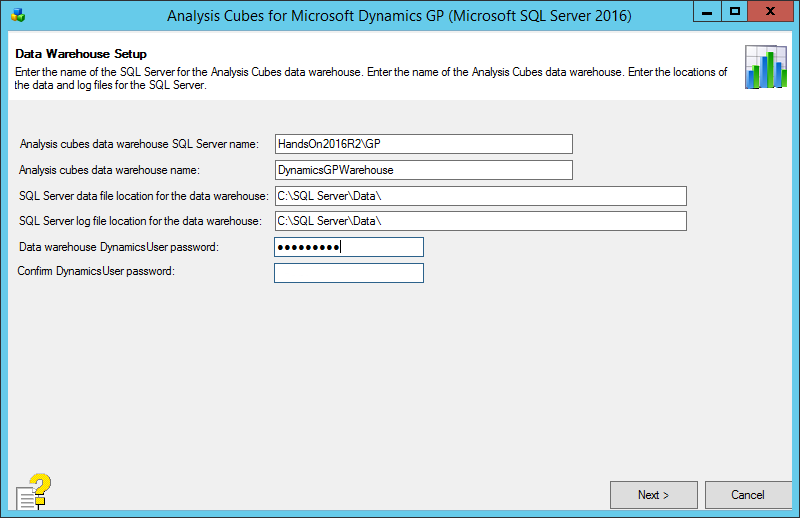
The first stage of the wizard is to complete the Data Warehouse Setup.
Enter the full SQL Server Instance name of the SQL Server which will hsot the datawarehouse database in the Analysis cubes data warehouse SQL Server name field; tab from the field and the SQL Server data file location for the data warehouse and SQL Server log file location for the data warehouse will default to the SQL Server defaults.
The Analysis cubes data warehouse name is set to a default of DynamicsGPWarehouse, but this name can be overridden.
Enter a Data warehouse DynamicsUser password and enter the same password in the Confirm DynamicsUser password and click Next:
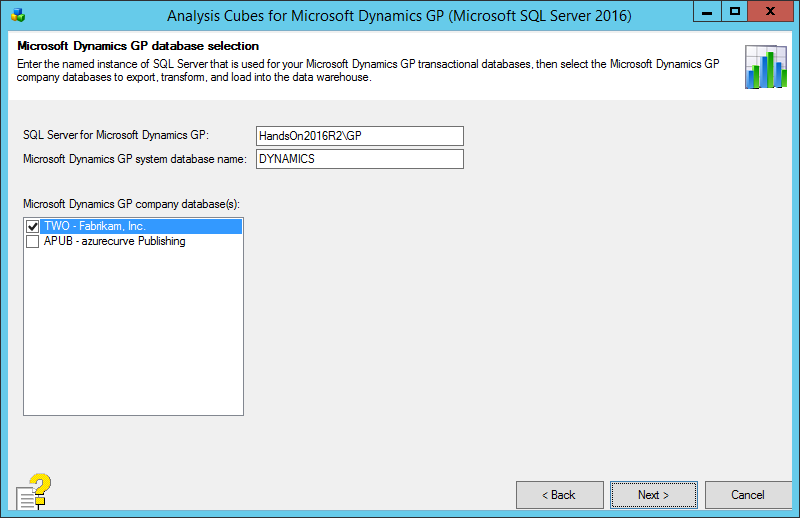
Enter the name of the Microsoft Dynamics GP SQL Server in the SQL Server for Microsoft Dynamics GP field.
If you are using a Named System Database, change the value in the Microsoft Dynamics GP system database name field.
In the list of Microsoft Dynamics GP company database(s) mark the checkbox for the companies which are to be available to the Analysis Cubes.
Once done, click Next:
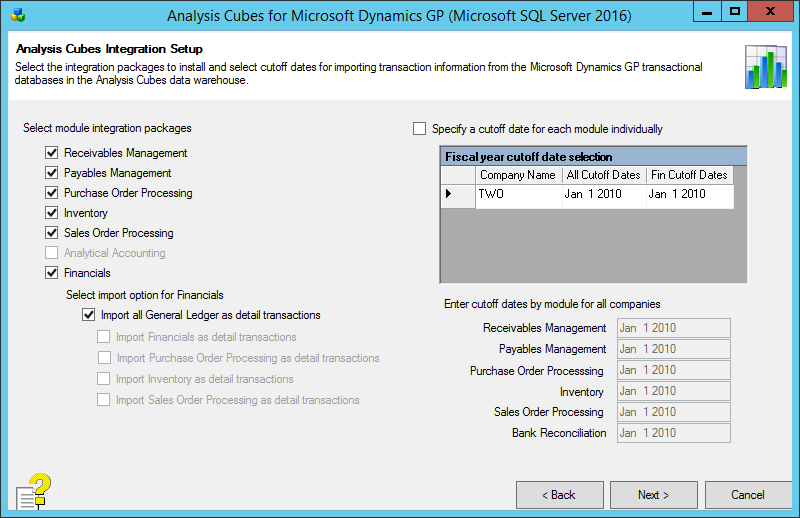
Select the modules for which integration packages should be installed; make sure you select all of the modules for which yuo want to use Analysis Cubes as this step is where you are selecting which SSIS packages willbe created to extract the data from the Microsoft Dynamics GP database.
Click Next:
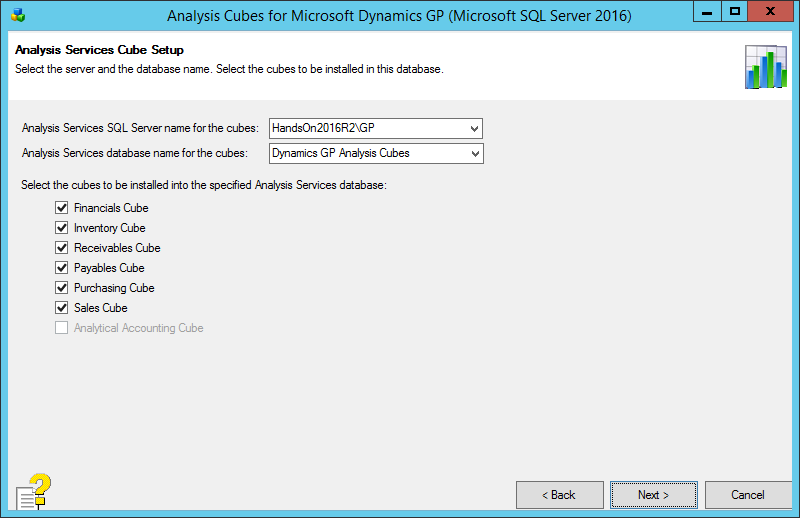
Enter the name of the SQL Server which will be used for the cubes (this is the full Instance name). Confirm the name of the Analysis Services database name for the cubes and select the cubes which should be installed.
Click Next:
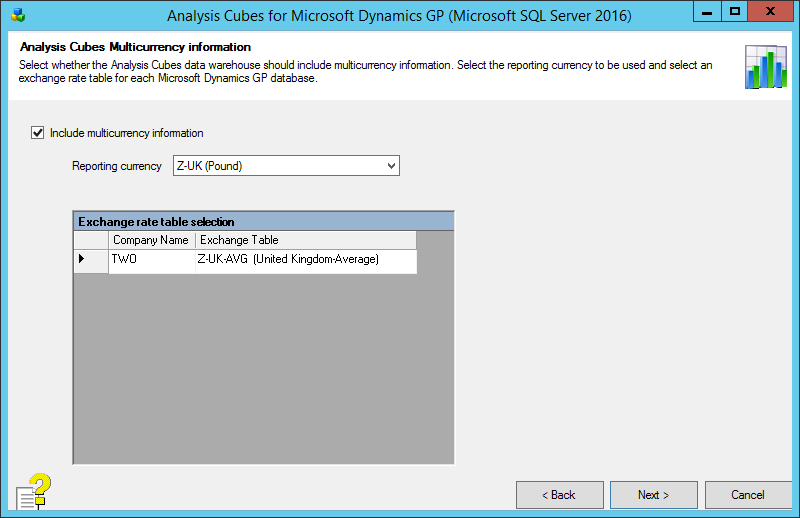
Decide if you want to Include multicurrency information and mark the box accordingly.
Select your Reporting currency and then for each Company select an Exchange table. Click Next to proceed:
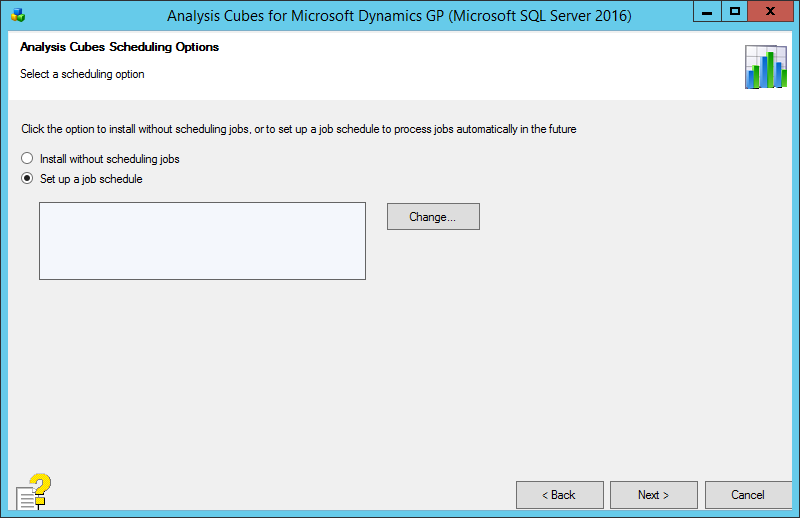
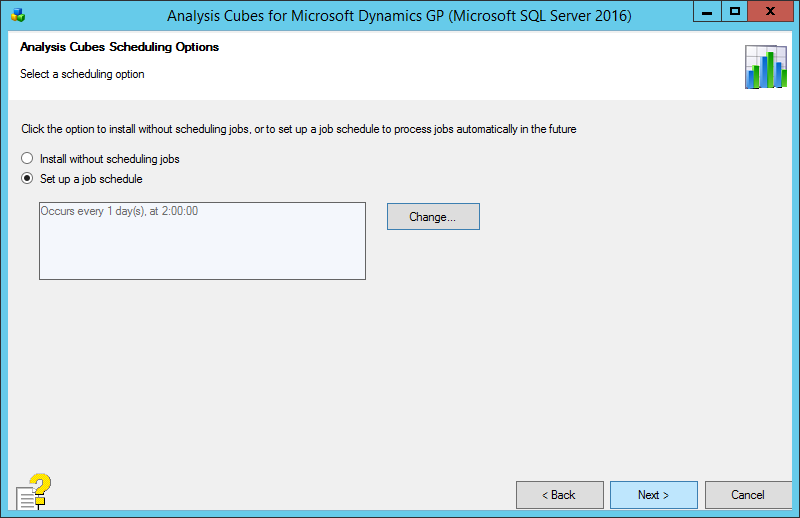
Analysis Cubes can be installed with, or without,a schedule. If you are configuring a schedule, as I am, mark the Set up a job schedule checkbox and click the Change button:
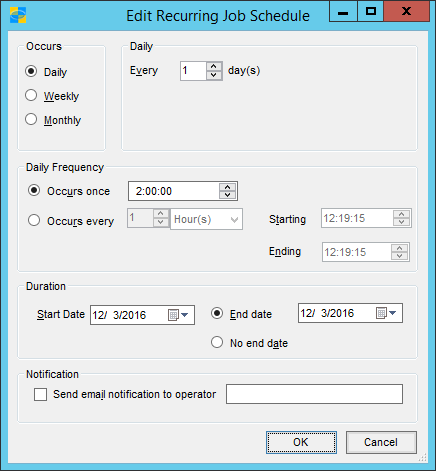
On the Edit Recurring Job Schedule window, configure your schedule and click OK:
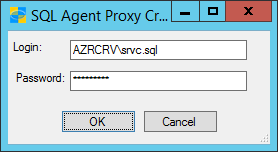
Enter a Login and Password for the SQL Agent Proxy and click OK:
Click Next:
Review the Analysis Cubes Installation Information and click Install:
Once the installation is complete, click the Exit button:
For some reason, the confirmation messages were black on black on my demo system, but I am not sure if this is a problem on my system or more widespread.
I’m not intending to delve further into the Analysis Cubes at the moment. If you want more information, the the Microsoft Dynamics GP 2013 Reporting – Second Edition book by David Duncan and Christopher J. Liley is a good place to start.
Click to show/hide the Hands On With Microsoft Dynamics GP 2016 R2 Series Index
What should we write about next?
If there is a topic which fits the typical ones of this site, which you would like to see me write about, please use the form, below, to submit your idea.


