 I covered a wide variety of topics mainly around GP and related products as well as a few around SQL Server but I’ve not actually done a post on the “correct” installation process of installing SQL Server for use with Microsoft Dynamics GP (I highlight correct as I’m sure some people will disagree with how I am doing the installation).
With the release of Microsoft SQL Server 2012 I thought it was time to rectify this. I am going to be installing the Enterprise Edition of Microsoft SQL Server 2012 but the process is the same for each of the versions. The install is being done as I usually do them on a VM for testing/demo purposes; I would pay more attention to security and the location of the log and data folders if this were being done on a production machine.
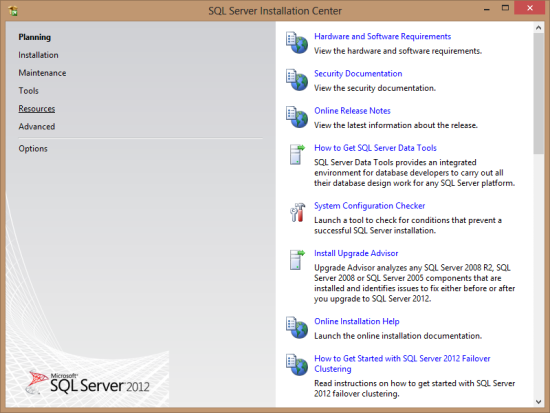
To install SQL Server, run the setup utility on the installation media which will open the SQL Server Installation Center;
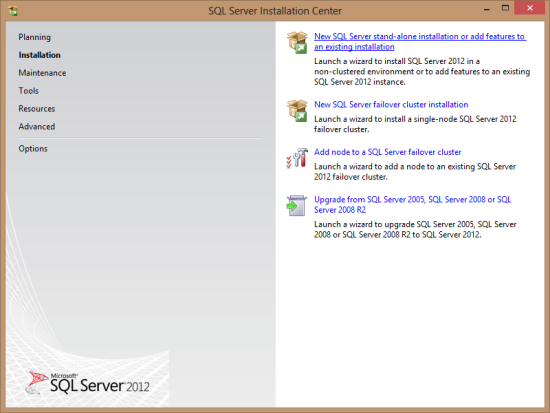
To install SQL Server, click Installation in the list on the left and then click New SQL Server stand-alone installation to add features to an existing installation;
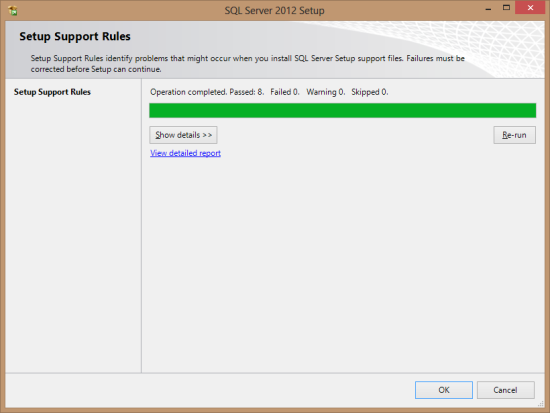
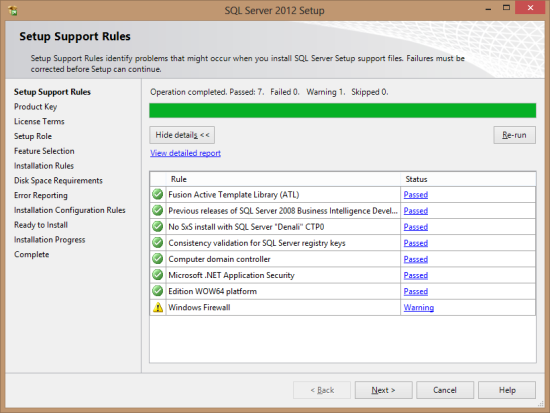
The Setup Support Rules step of the installation process will identify any problems which might occur when installing the SQL Server Setup support files;
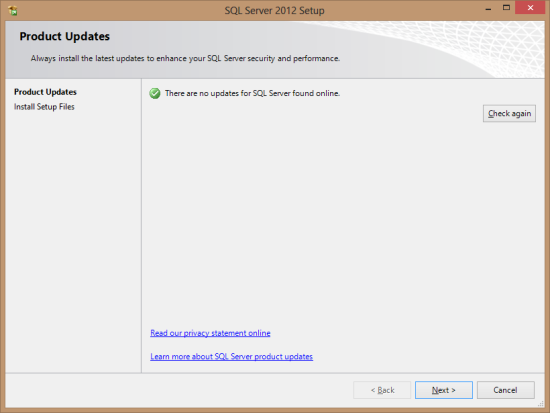
The Product Updates step is, if I remember the SQL 2008 R2 setup utility correctly, a new one which will check online for any updates to SQL Server;
In the Setup Support Rules step, any problems which would interrupt the install will be identified and must be corrected before the install can proceed.
I don’t have any errors but do have one warning related to the Windows Firewall which would need to be resolved on a production or test machine that will be accessed remotely (I’m actually installing it into a standalone VM for testing);
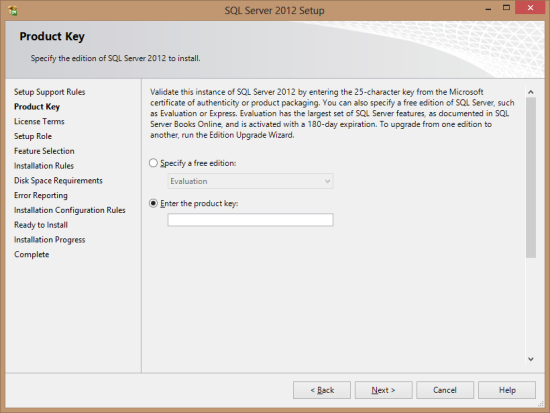
Select a free edition or enter your product key;
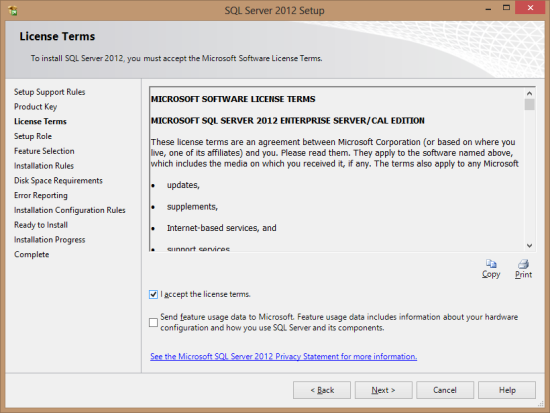
You must accept the Microsoft Software License Terms to proceed;
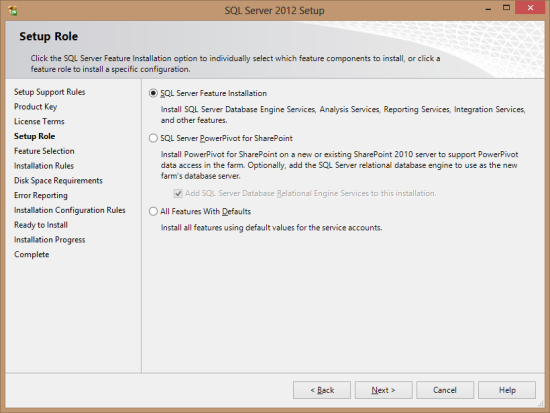
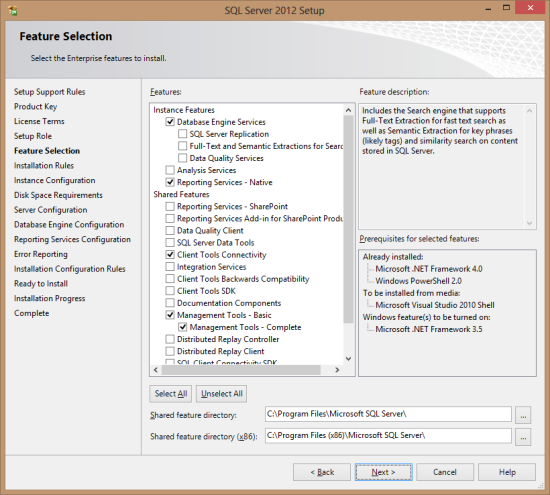
Select the features you wish to install onto the machine. In this example I am installing the SQL Server Feature Installation;
Next select the required features. For Microsoft Dynamics GP select the Database Engine Services and Reporting Services (Native) (if you want, as I do, to use the free Reporting Services reports which ship with Microsoft Dynamics GP) from the Instance Features Section and Client Tools Connectivity from the Shared Features list.
I have also chosen to install the Management Tools – Basic and Management Tools – Complete so I can use Management Studio to manage SQL Server and the SQL Server Agent;
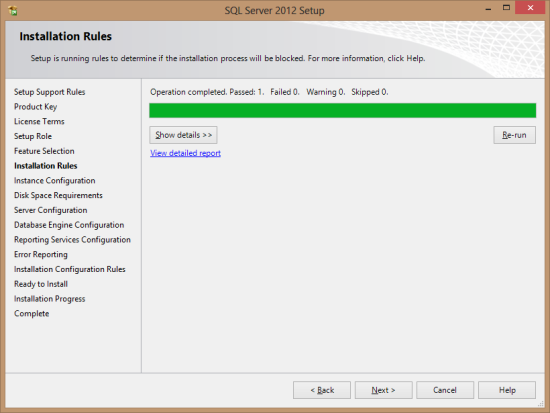
The Installation Rules step will validate the installation process to make sure it won’t be blocked;
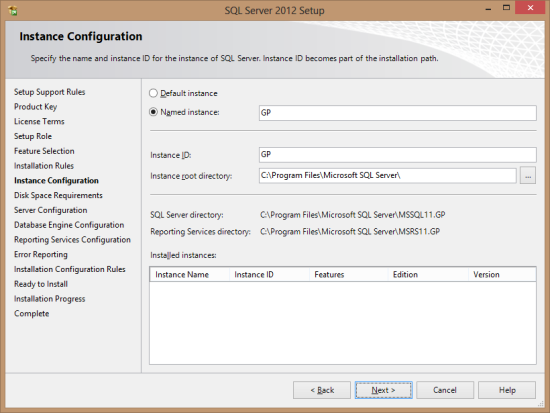
Next, you will need to configure the SQL Server Instance. It is generally recommended to install SQL Server using a named instance called “GP” for use with Microsoft Dynamics GP which is what I have done here.
You can also change the default instance root directory if you so desire;
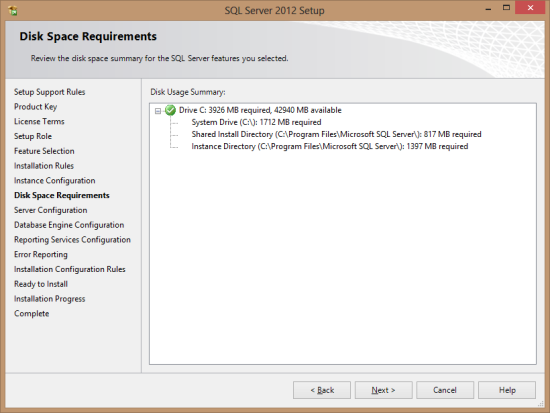
Check the disk space requirements to make sure that the selected drive has sufficient space;
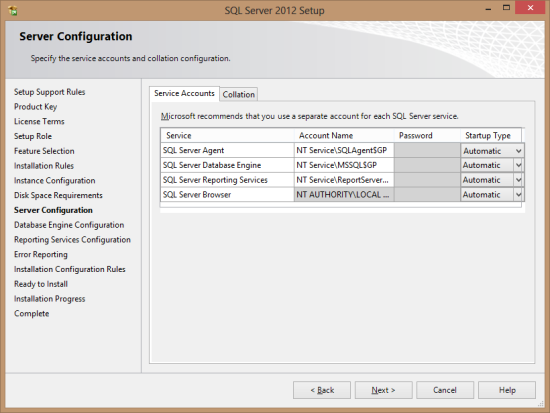
Next you will need to configure the service accounts which should be used. Recommended practice is to use separate named Domain User accounts for each of the services used by SQL Server (the following screenshot shows the default service accounts which you override simply by typing over them);
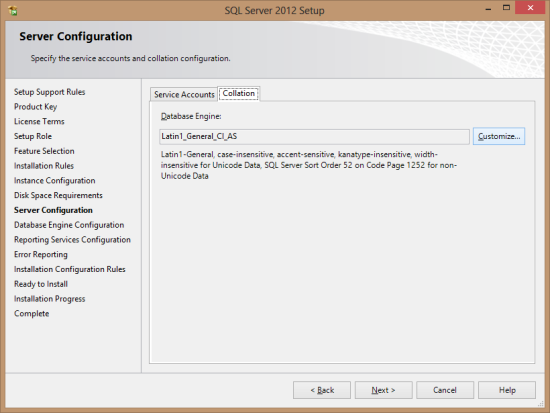
Move to the Collation tab because the collation needs to be changed from the “SQL default of “Latin1_General_CI_AS”;
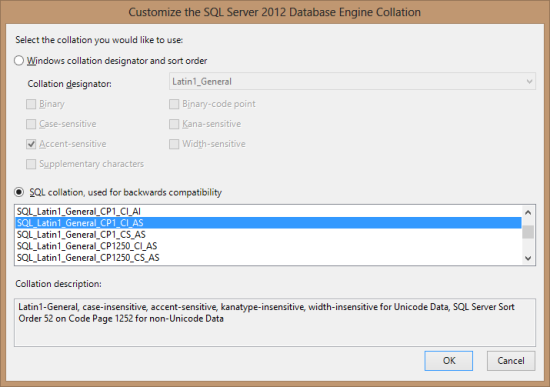
Clicking the Customize button will open the Customize the SQL Server 201 Database Engine Collation window.
Microsoft Dynamics GP is only supported with two collations;
- Binary – sort order 50
- Dictionary Order, Case Insensitive (DOCI) – sort order 52
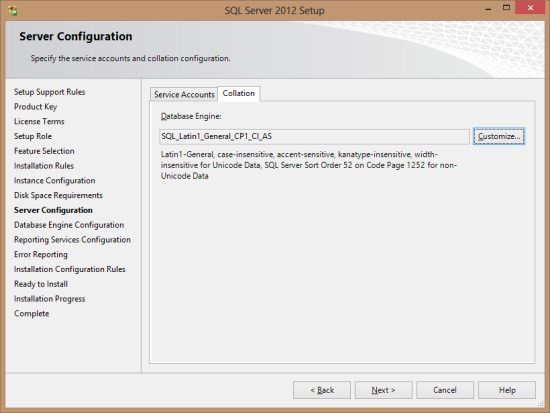
However, I would very strongly recommend using only the latter of the two collations which is presented in SQL Server as SQL_Latin1_General_CP1_CI_AS;
Once you’ve selected the correct collation, clik Next to proceed;
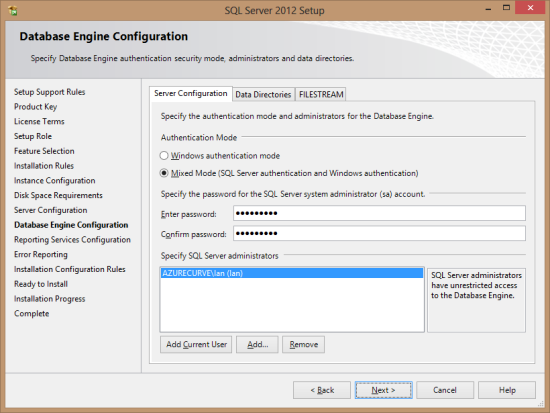
When configuring the database engine, make sure you select Mixed Mode (SQL Server authentication and Windows authentication) and define a password for the SQL Server system administrator (sa) account.
You also need to specify at least one windows account to be a SQL Server administrator. Generally this should be a Domain Administrator but in this example SQL Server is not being installed into a Domain environment so I have just used the local machines Adminisrtrtor user;
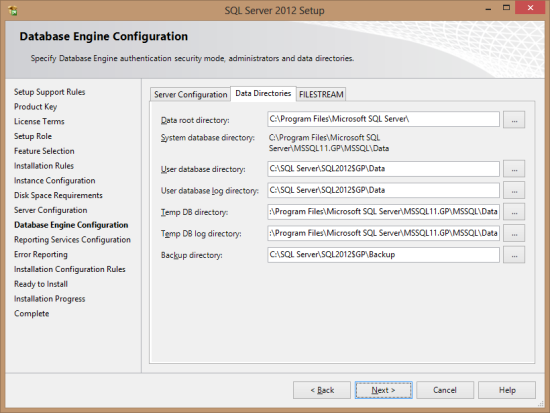
Move across to the Data Directories tab and change the location of the data, log and backup directories.
It is generally recommended that the data and log files be on separate hard disks. In this test environment, I have moved the three directories to a different location on the c drive;
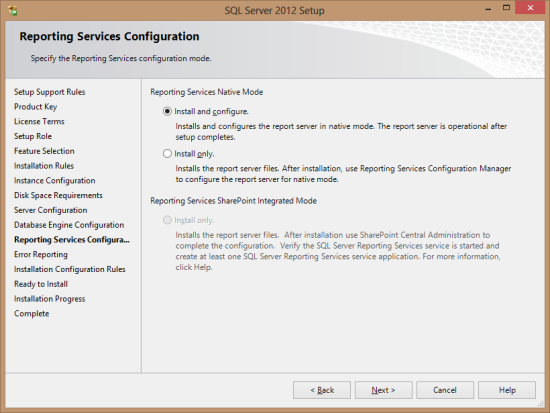
Because I chose to install the Reporting Services (Native) I was prompted to either Install and configure or just to Install so it can be manually configured later. In this instance I am happy to have the default configuration of the Reporting Services;
Choose if you would like to send Windows and SQLServer error reports to Microsoft;
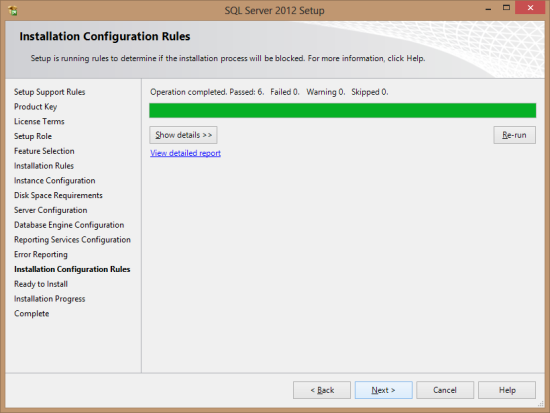
SQL Server 2012 Setup will verify the configuration to determine if anything would cause the installation to be blocked;
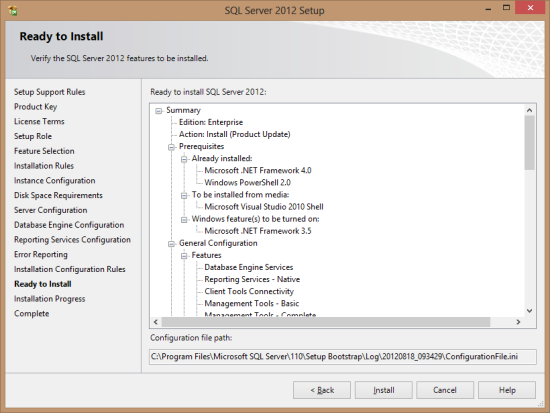
Review the SQL 2012 features to be installed and if happy, click Install;
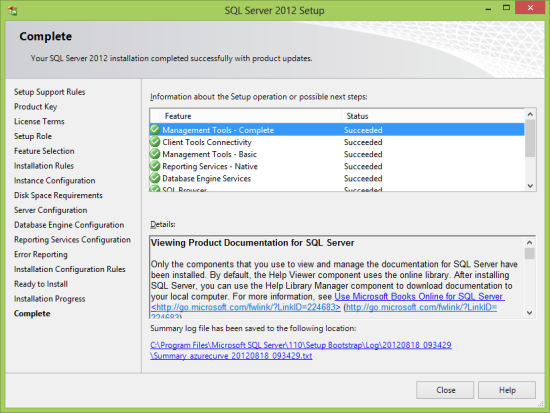
Once the installation is complete, SQL Server 2012 Setup will confirm this showing which items of the install succeeded;
NB: The different window colour on this last screenshot is because this machine is running Windows 8 and is picking up the window colour from the predominant colour of the Windows desktop background wallpaper which changed during the install.
What should we write about next?
If there is a topic which fits the typical ones of this site, which you would like to see me write about, please use the form, below, to submit your idea.





1 thought on “How To Install Microsoft SQL Server 2012”